 Blender
 Cinema 4D
 Arnold
 3ds Max
 Houdini
 V-Ray
V-Ray Maya
Maya Unreal Engine
 Nuke
Nuke Pricing
 New User Bonus
 Cost Estimator
 India Diwali Offer

Cinema 4D Trouble Shooting
Texture in file missing
-
Please check if the following textures are used in the scene or not; if yes, use File->Save Project with Assets to package the complete project directory, to ensure that all the textures and cache files can be loaded correctly; if not, it is recommended to clear them up and submit them again. Clearing up method: find the corresponding unused texture in the Texture Manager of the Window menu, and right-click Clear Textures to clear up the unneeded texture. Note: Manually put the used texture in the tex folder when the ass of arnold is used as proxy because C4D automatic packaging can’t successfully package ass.
-
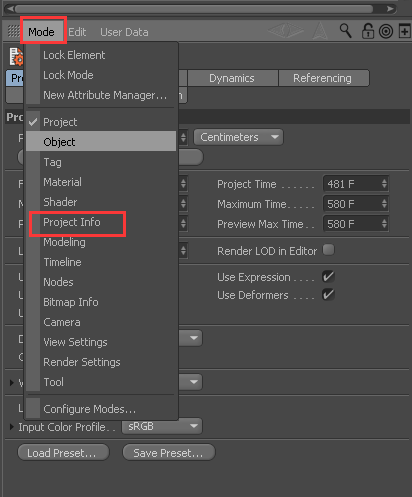
Confirm whether there is any missing texture in the scene: sometimes the presets used or the textures under other plugins may also be lost. Open the scene.
-
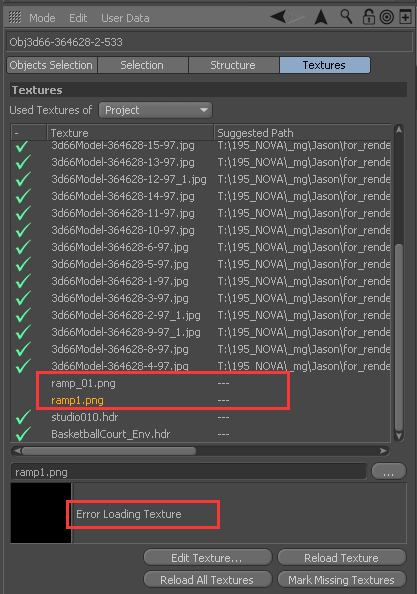
A symbol means the texture can be loaded normally; a × symbol or Error Loading Texture displayed means that the texture can’t be loaded normally, then re-designate the texture path in the file.
Texture file is a video file
Method: If the texture in the scene file is in video format which is not supported by the platform, such as light_1.mov, then change the .mov file to a texture format, reload the texture file for resubmission.
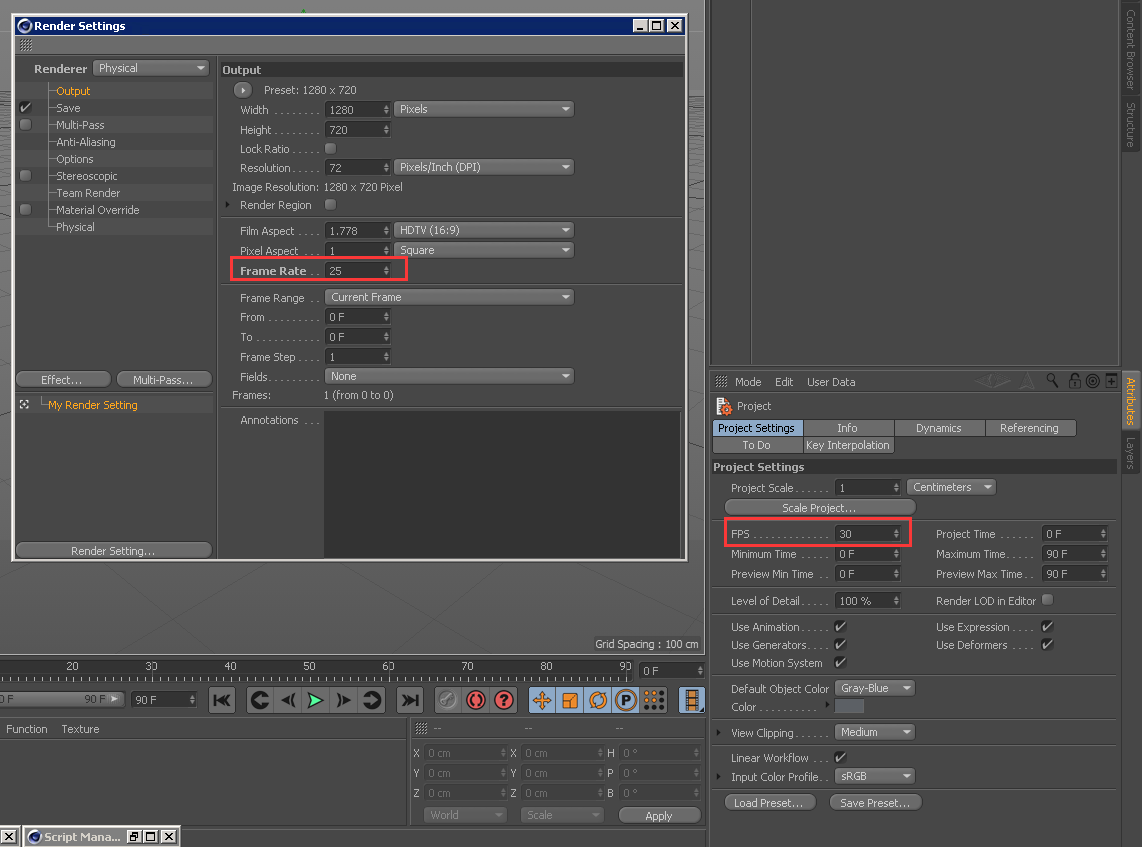
Different frame rates
Method:
Unify the Frame Rate under Render Settings and FPS under Project Settings.
Rendering output image in an unsupported format
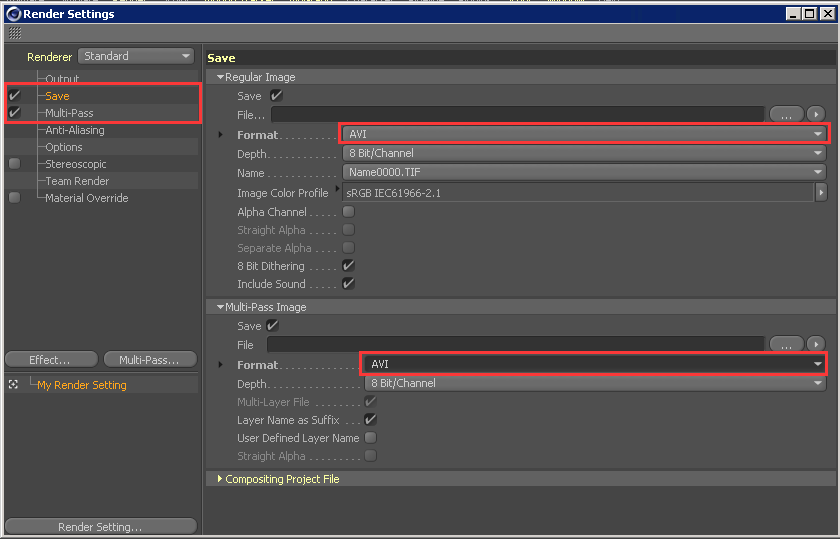
C4D output format problem:
If the rendering output is in a video format unsupported by the platform, then change it to the image format, package the file and then submit it. The formats unsupported are listed as: Arnold-Dummy, 3GP, ASF, AVI, MP4, WMV, AVIMovie, QuickTimeMovie, QuickTimeVRPanorama, QuickTimeVRObject.
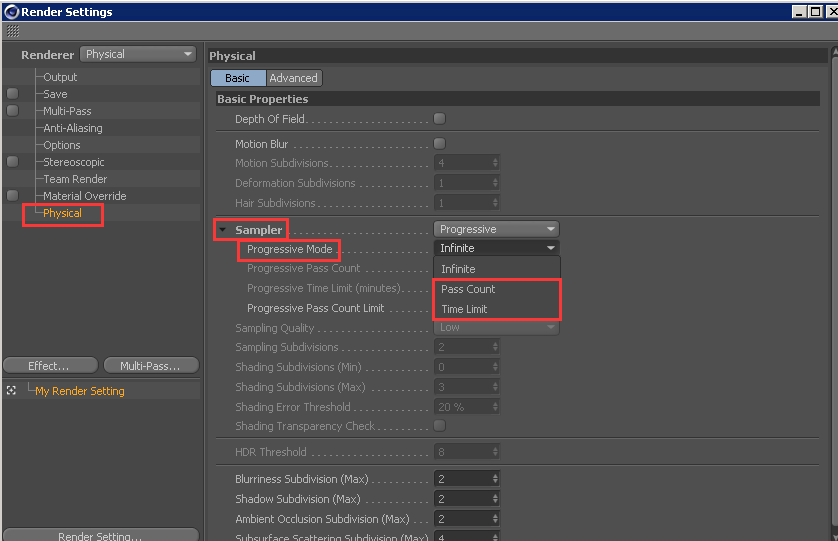
Turn off "infinite"rendering
Change the Progressive Mode under the Physical of Renderer to: Pass Count or Time Limit mode to avoid "infinite" rendering which wastes valuable time and node resources.
ACES in C4D: Submit with OCIO (Octane)
When using ACES for C4d, select OCIO (for Octane) for submission, which is only for use with TCO, not RedShift.
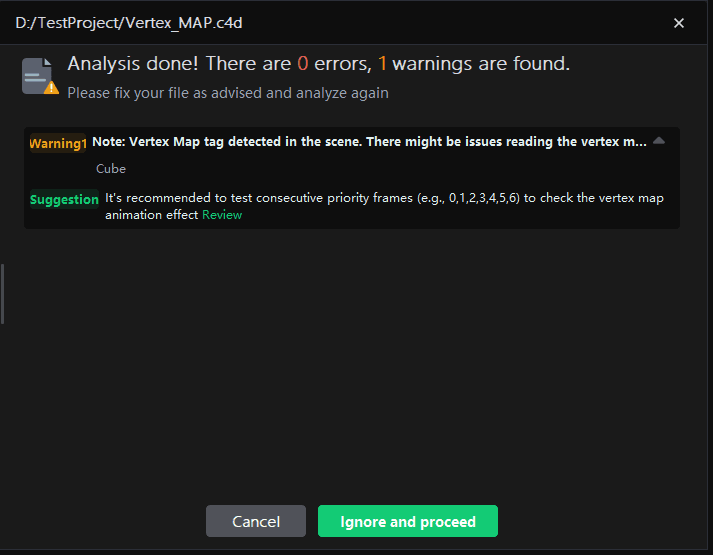
35070:Vertex maps cannot be read correctly warning
Note: Vertex Map tag detected in the scene. There might be issues reading the vertex map correctly during multi-machine rendering
Solution 1 :Cinema 4D Vertex Map Baking Tool User Guide
The Vertex Map Baking tool is used before render submission. It bakes Vertex Map data used in Redshift or Octane materials into regular texture files.
After the job is submitted to Renderbus, the render process automatically reads the generated manifest and baked textures, then replaces the texture inputs before rendering. This prevents render nodes from failing to read local Vertex Map data correctly.
In normal customer workflows, customers only need to finish the local bake and submit the render job. They do not need to replace materials manually.
Recommended Workflow
1. Save the C4D scene.
2. Open the top menu in the submit plugin: Tools > Vertex Map Baking (If you need to install plugins, launch the client and complete the installation on the Plugin Management page.)
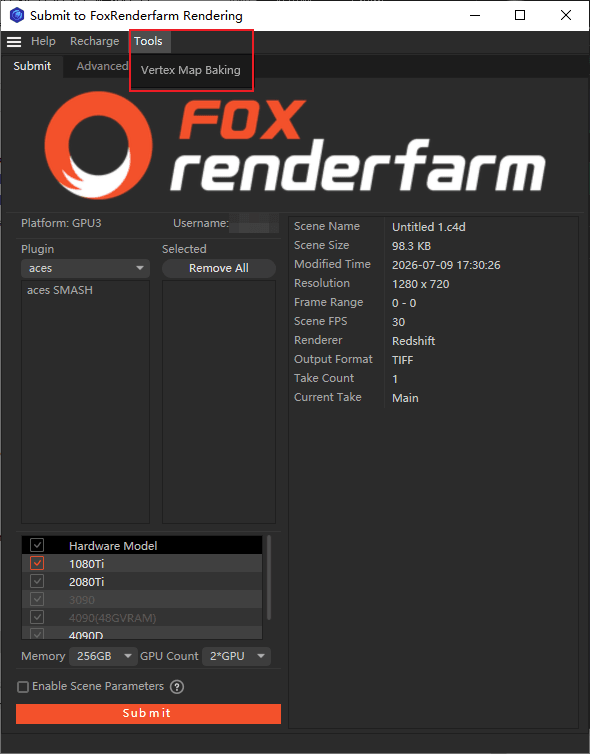
3.Texture Size & Format Settings: 2048×2048 PNG is recommended by default. Enable [Auto UV] if the model contains no valid UVs.
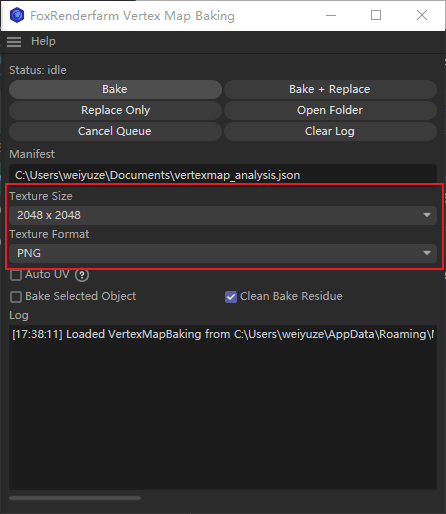
4. Click [Bake] to generate the baked Vertex Map textures and the analysis manifest.
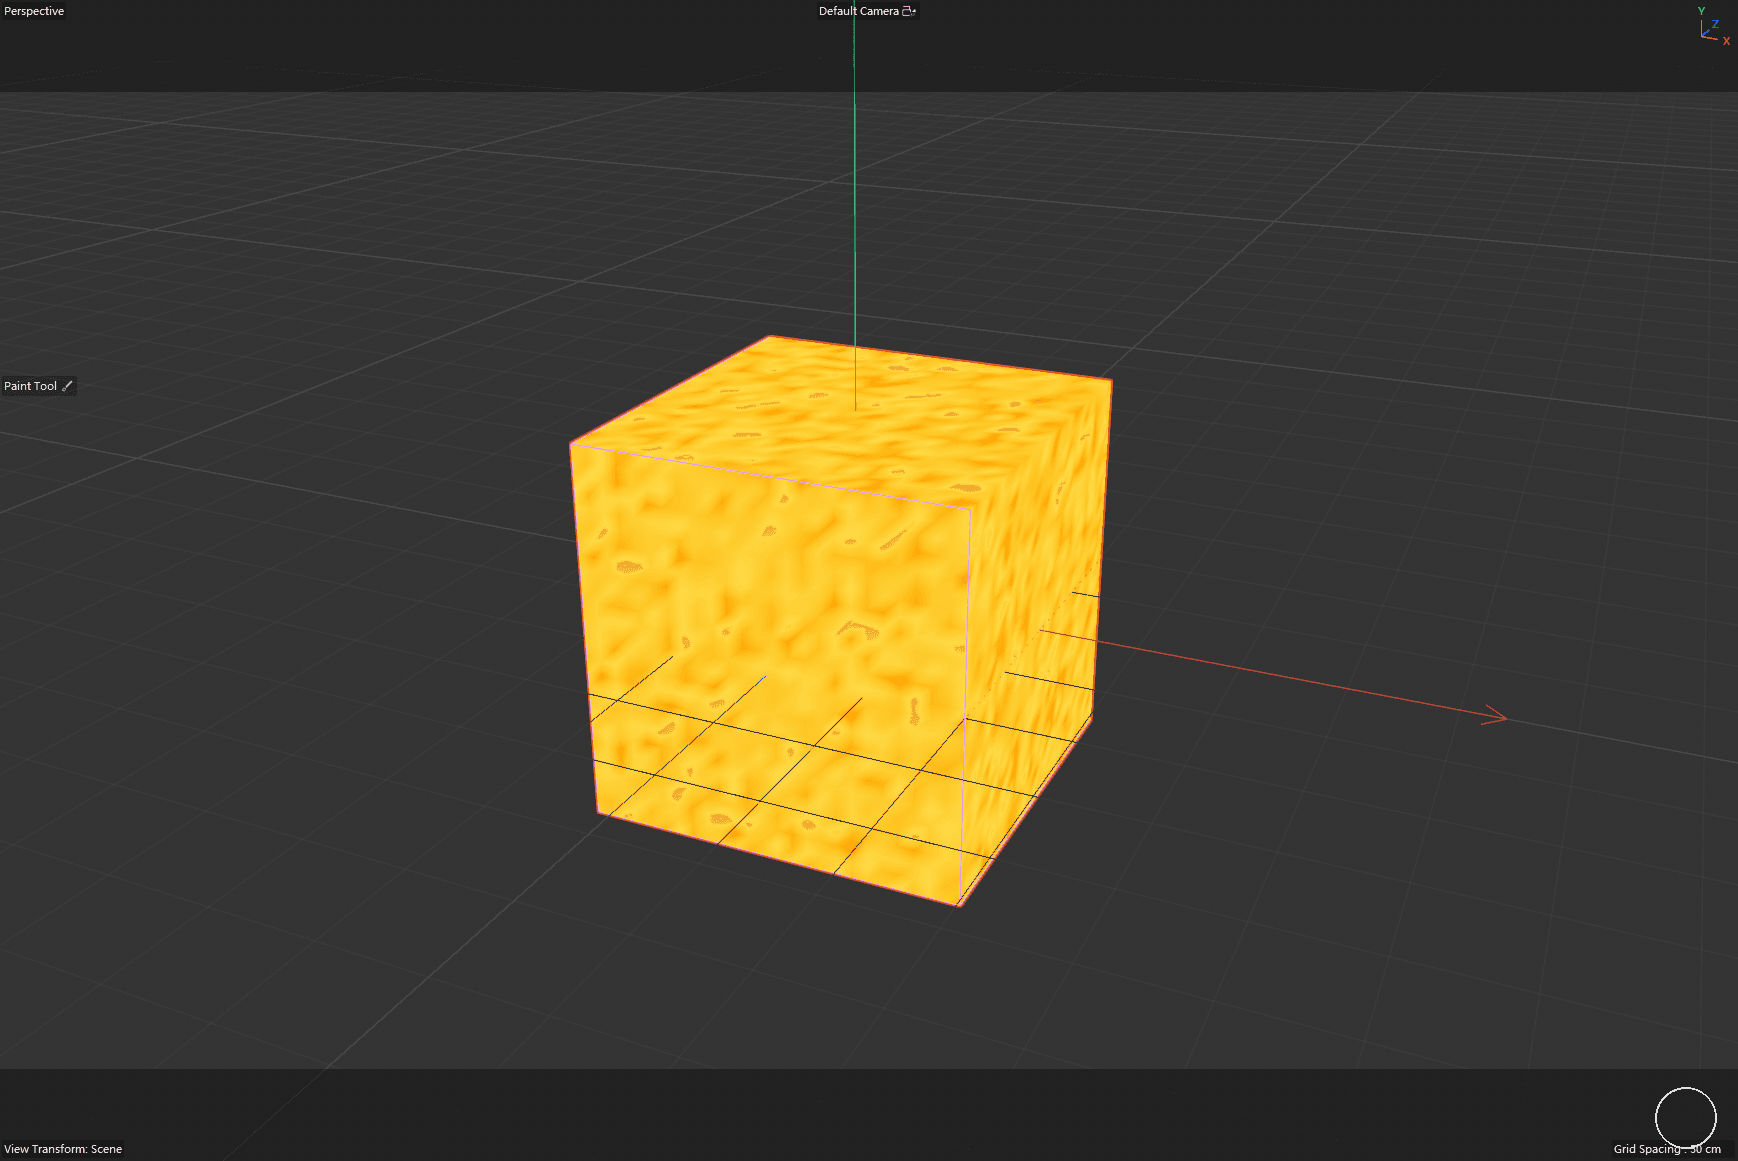
5. After baking is complete, submit the render job normally. The render side will automatically replace the textures.
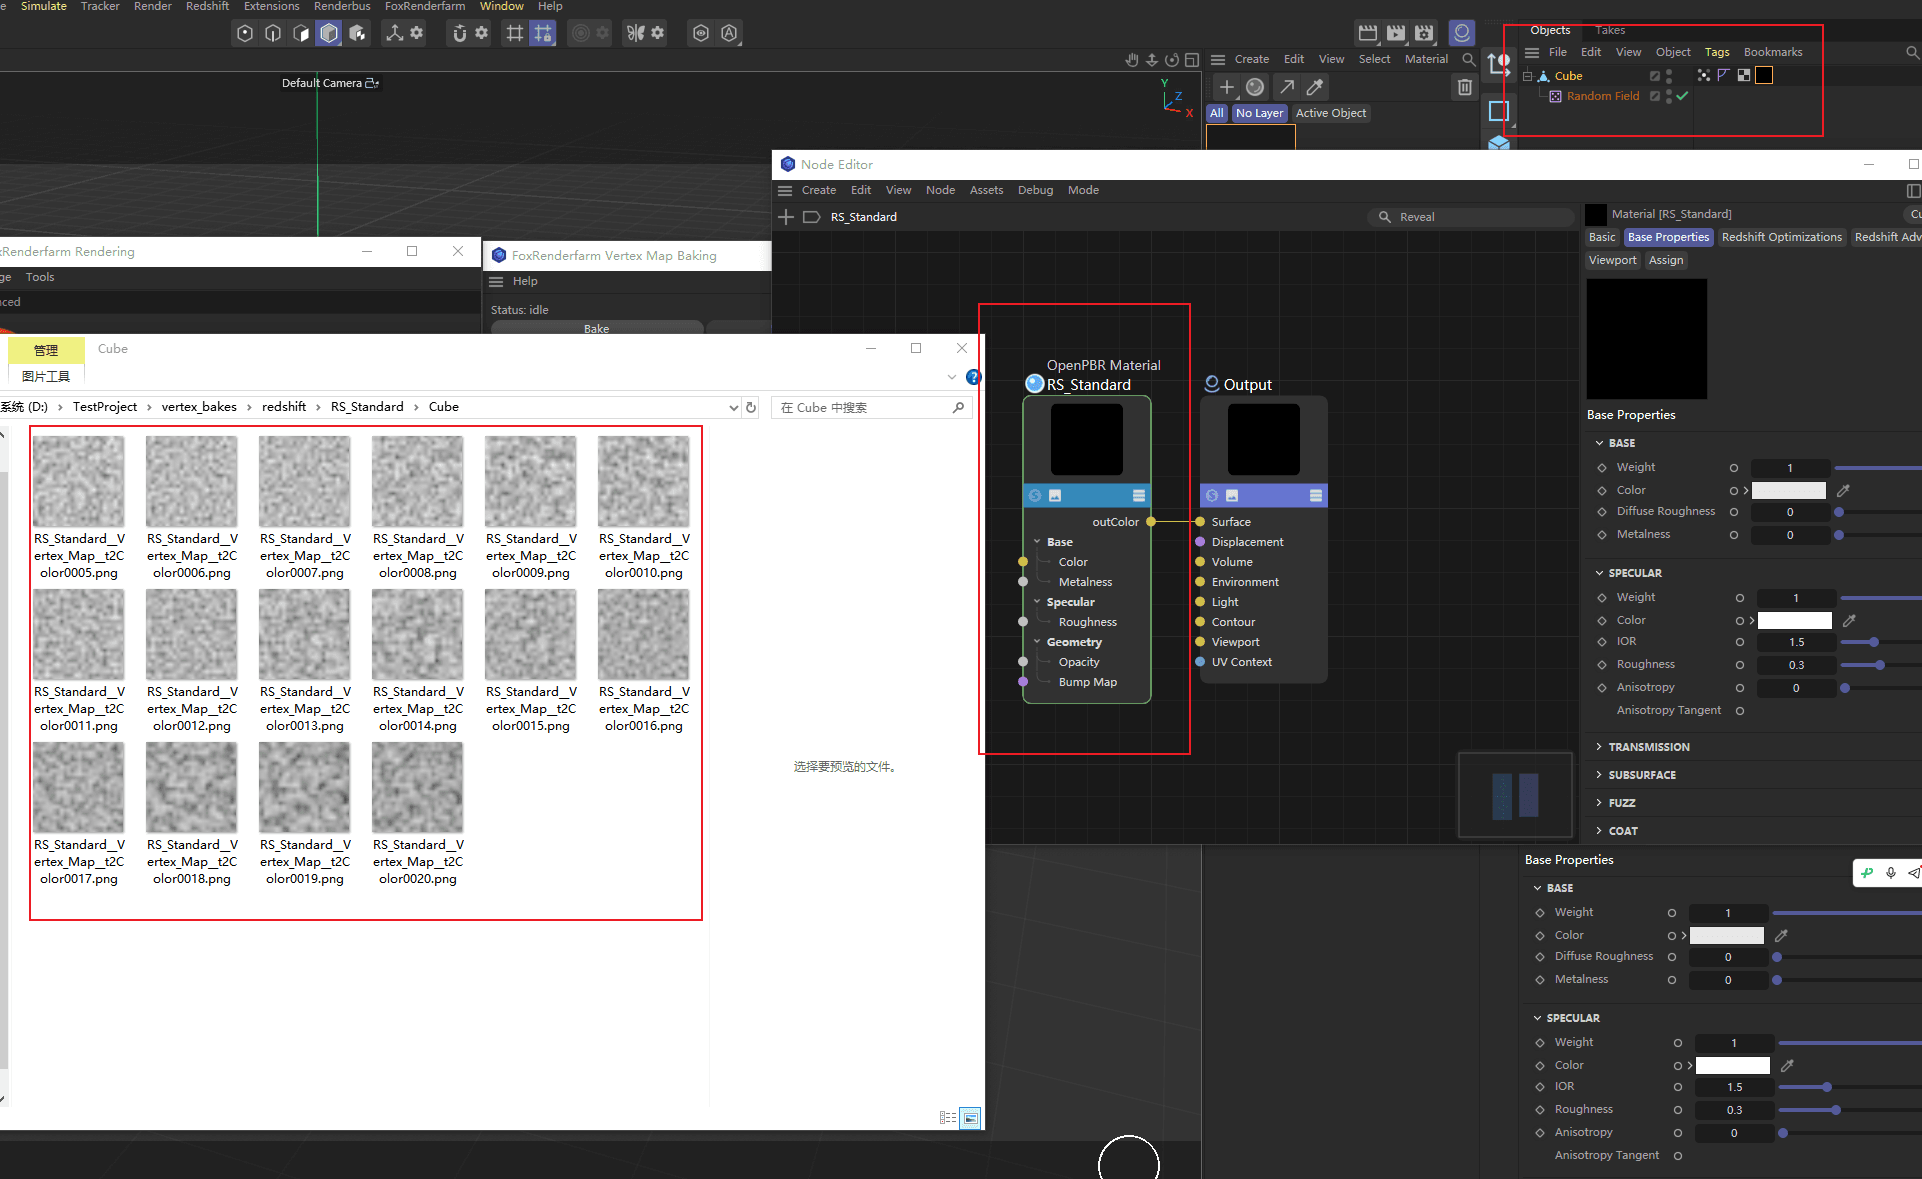
Function Button Descriptions
1. Bake (Recommended): Analyze the scene to generate vertex bake textures and manifest files. After job submission, the server replaces textures automatically for rendering based on these files.
2. Bake + Replace (Local Preview): Run baking first, temporarily replace scene materials with baked textures to compare differences between baked results and original vertex maps.
3. Replace Only (Local Preview): Reuse existing baked textures without re-baking; replace materials via manifest files to preview effects.
4. Open Folder: Jump to the output directory of baked textures.
5. Cancel Queue: Terminate the ongoing bake task queue.
6. Clear Logs: Erase logs in the panel without deleting textures and manifest files.
Parameter Options Description
1. Manifest File: Defaults to vertexmap_analysis.json, storing bake configurations and data required for automatic texture replacement during rendering.
2. Texture Size: Optional 1024/2048/4096/8192
3. Texture Format: Supports PNG, JPG, TIF, EXR
4. Auto UV: Unfolds UVs automatically for objects without valid UVs; use cautiously for assets relying on manual UVs.
5. Bake Selected Objects: Bake only selected models for partial debugging.
6. Clean Bake Residues: Remove temporary bake tags and temporary materials while retaining finished textures.
Notes:
1. Keep the vertex_bakes folder and vertexmap_analysis.json after baking. The server relies on these files to auto-replace textures during rendering submission.
2. Bake + Replace and Replace Only are only for local preview verification. Do not submit the modified scene with replaced materials. Submit jobs directly after baking as the standard workflow.
FAQ
Q: Is Bake + Replace mandatory?
A: No. The standard workflow is to submit rendering directly after baking.
Q: When to use Bake + Replace?
A: For local preview of baked textures. If there is a large visual difference from the original scene, check UV layout, texture resolution and material node settings.
Q: Why is the manifest file required for rendering submission?
A: The server uses the manifest to match material nodes and auto-apply baked textures. Missing this file will cause texture replacement to fail.
Solution 2 :Manual Baking Method
Step 1 : Create a new default material ball and add the vertex map effect.
1.Open the material ball editing panel > Color > Effect > Vertex Map.
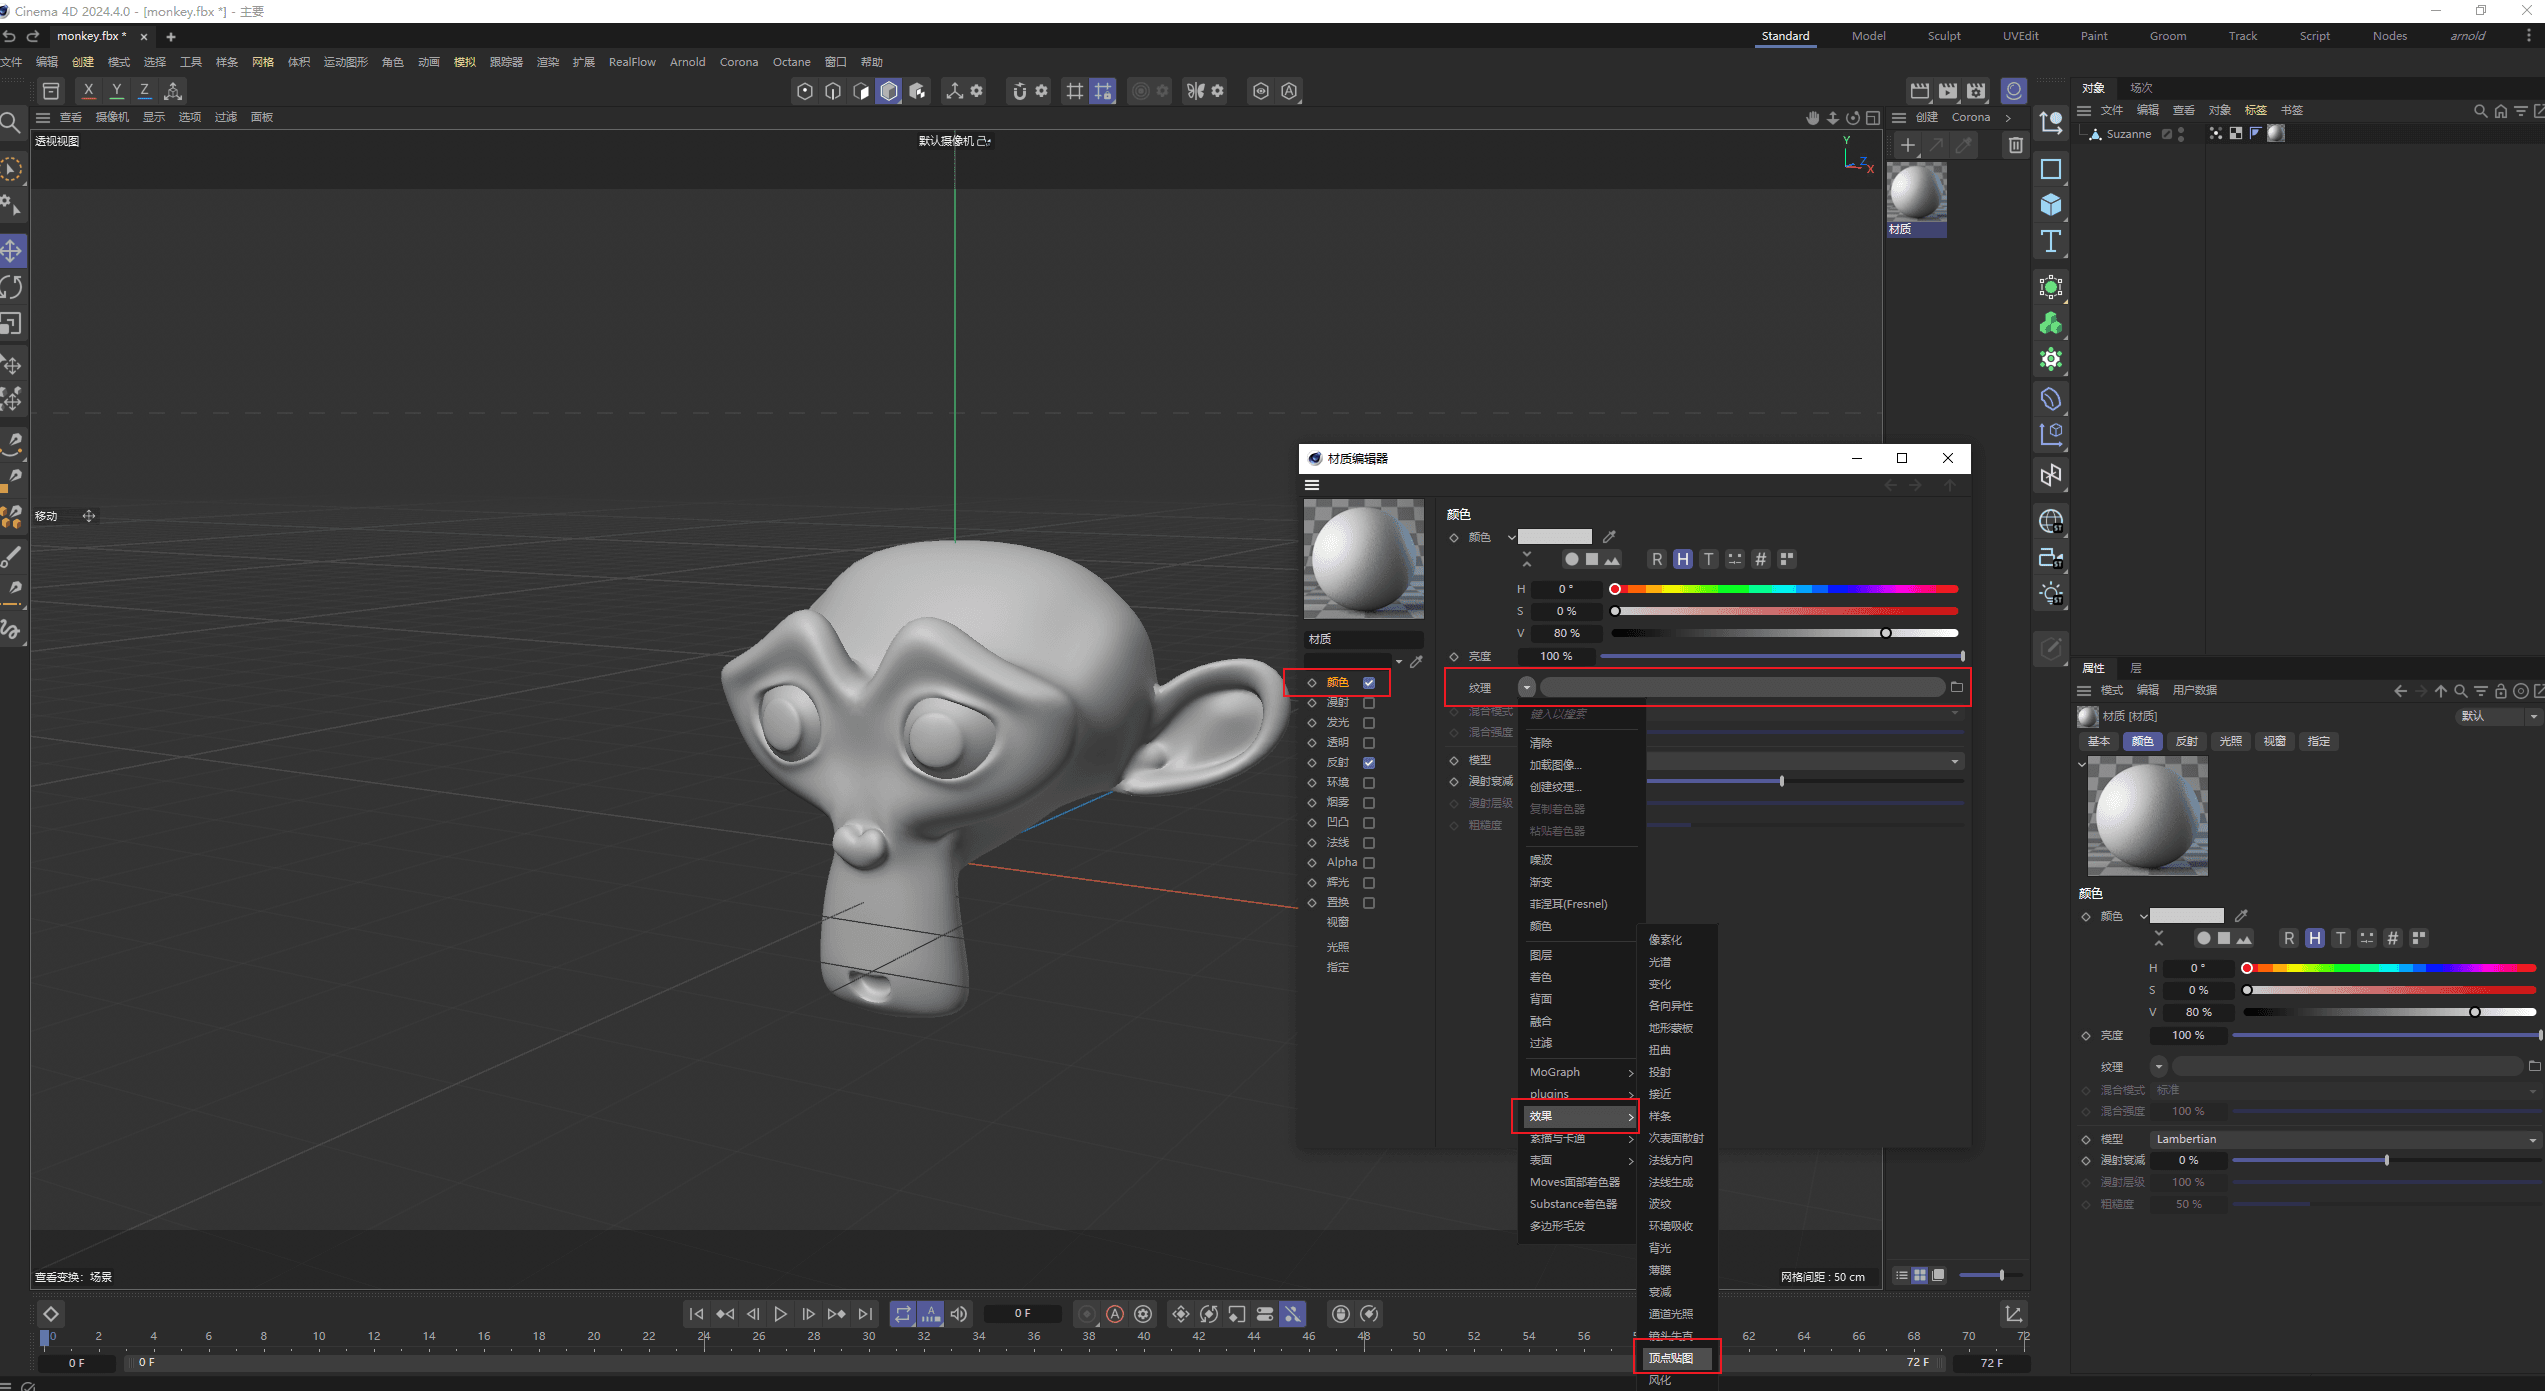
2.Drag the vertex map tag on the model into the corresponding position of the material ball.
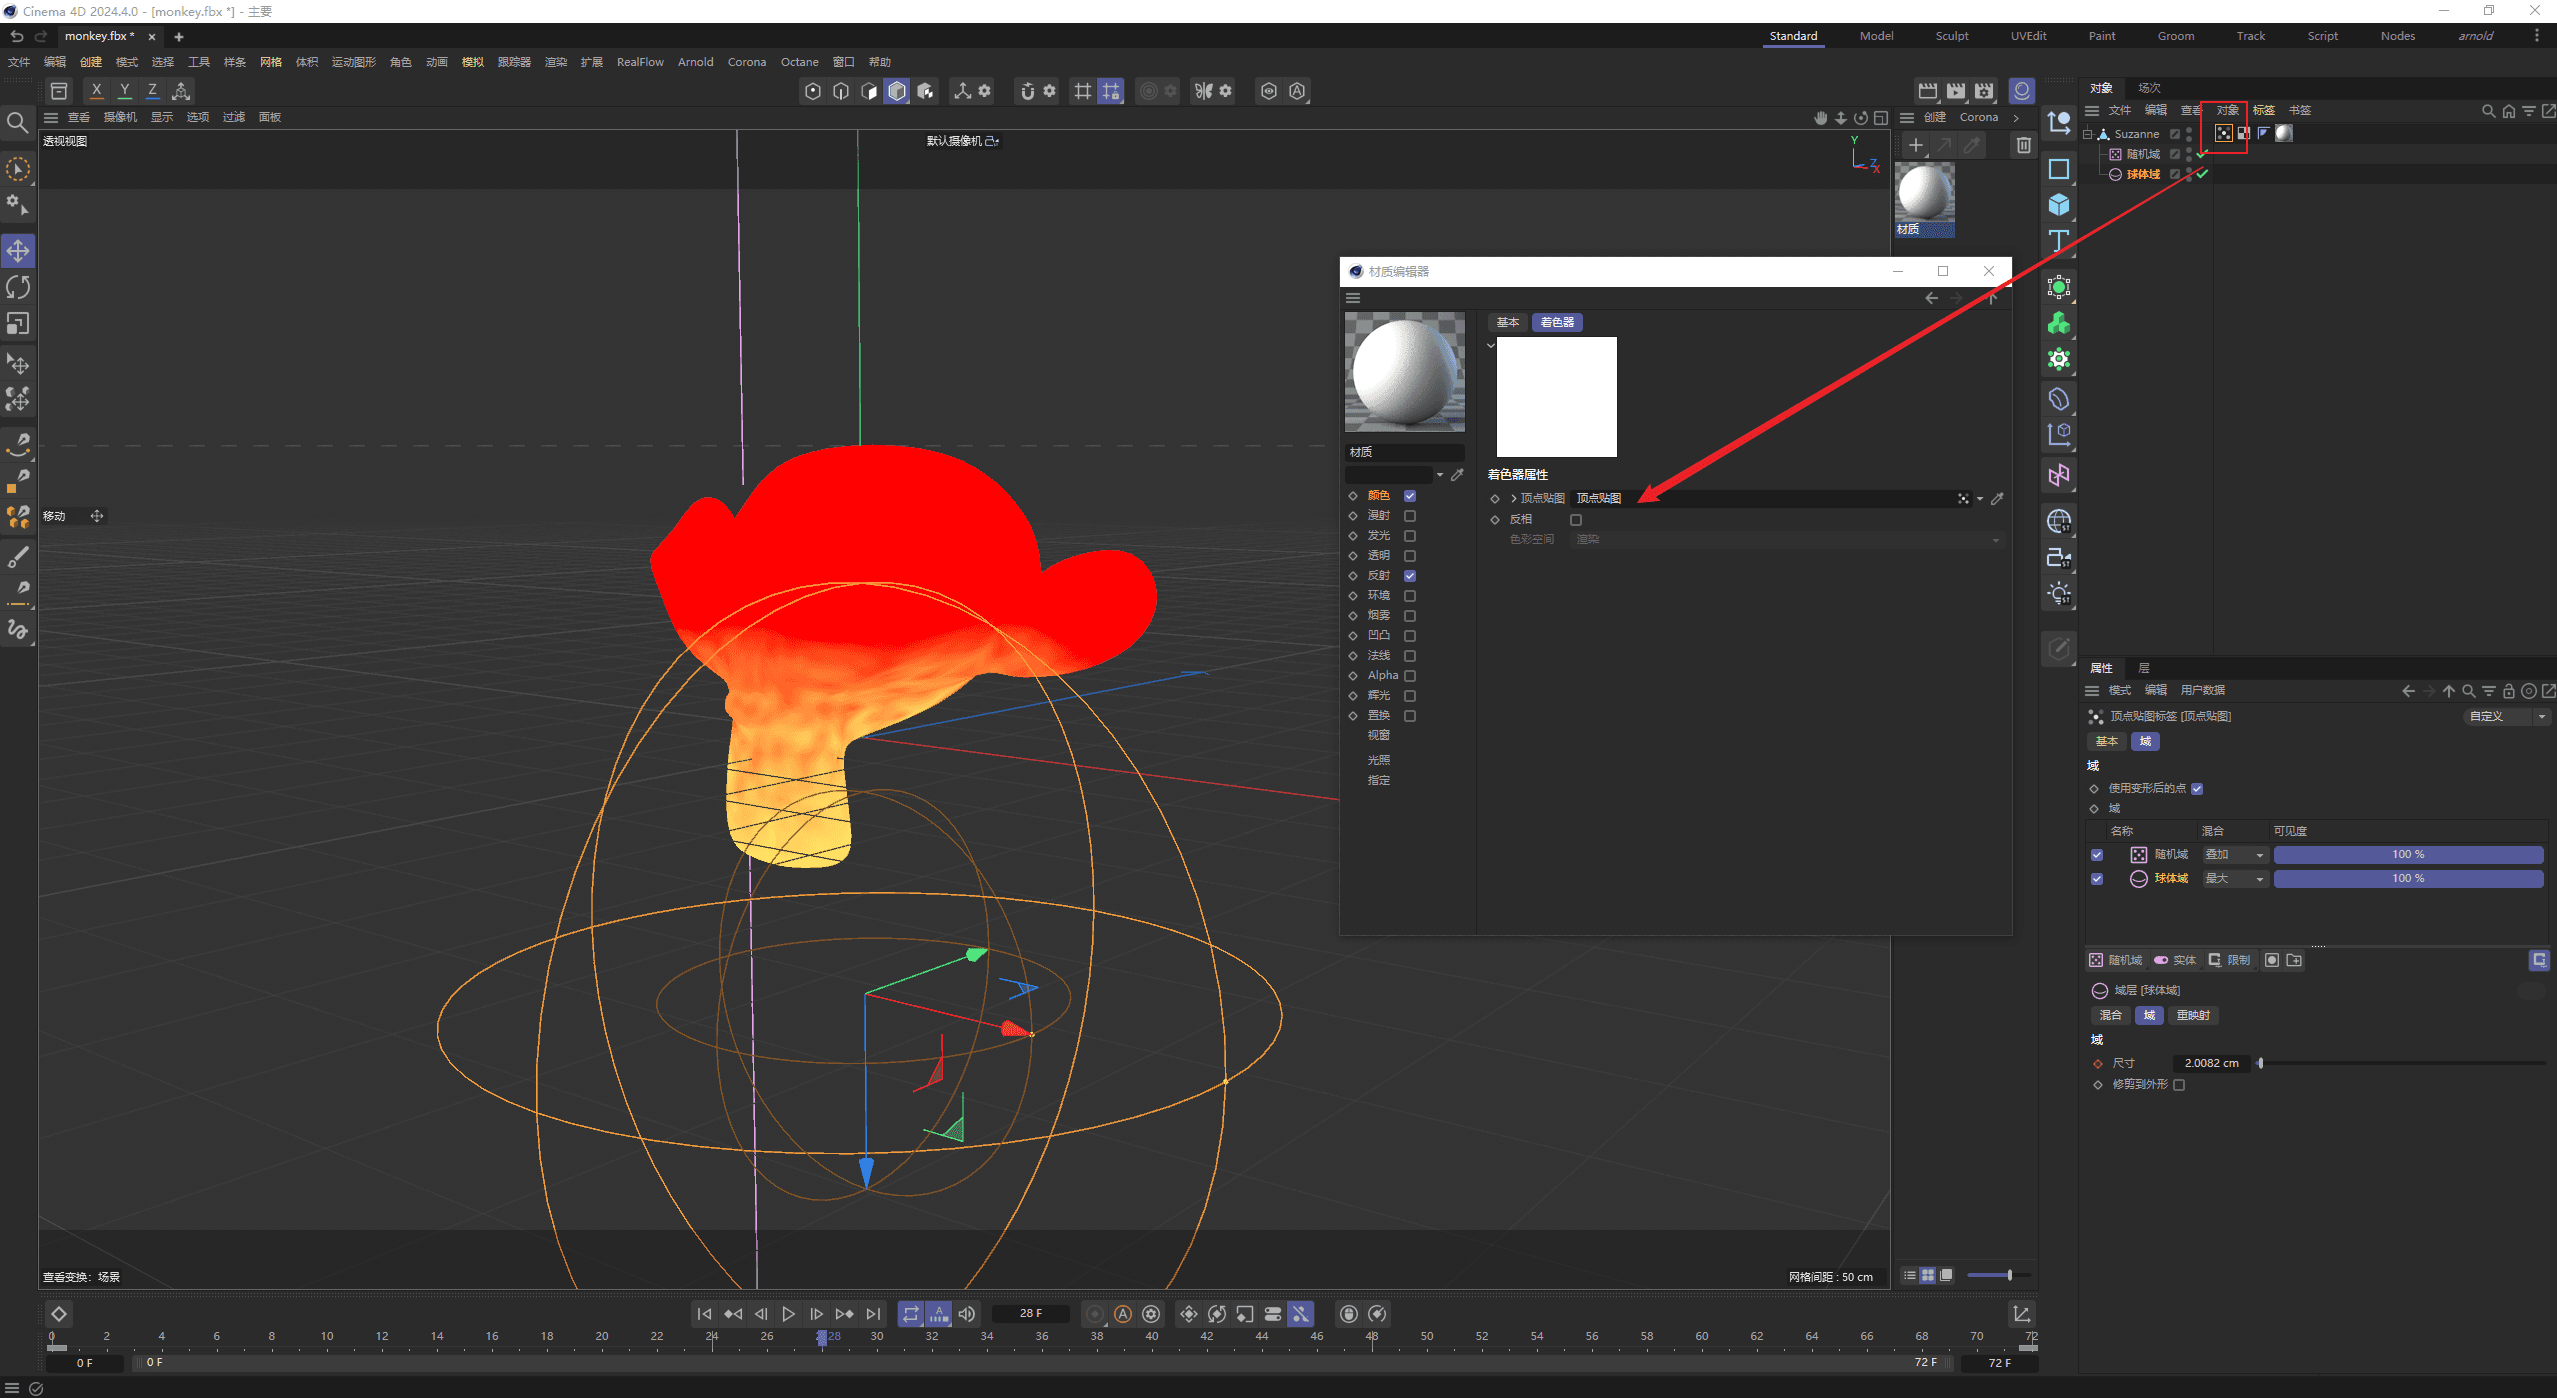
Step2: Bake the material.
1.Right-click on the model > Material Tag > Bake Material.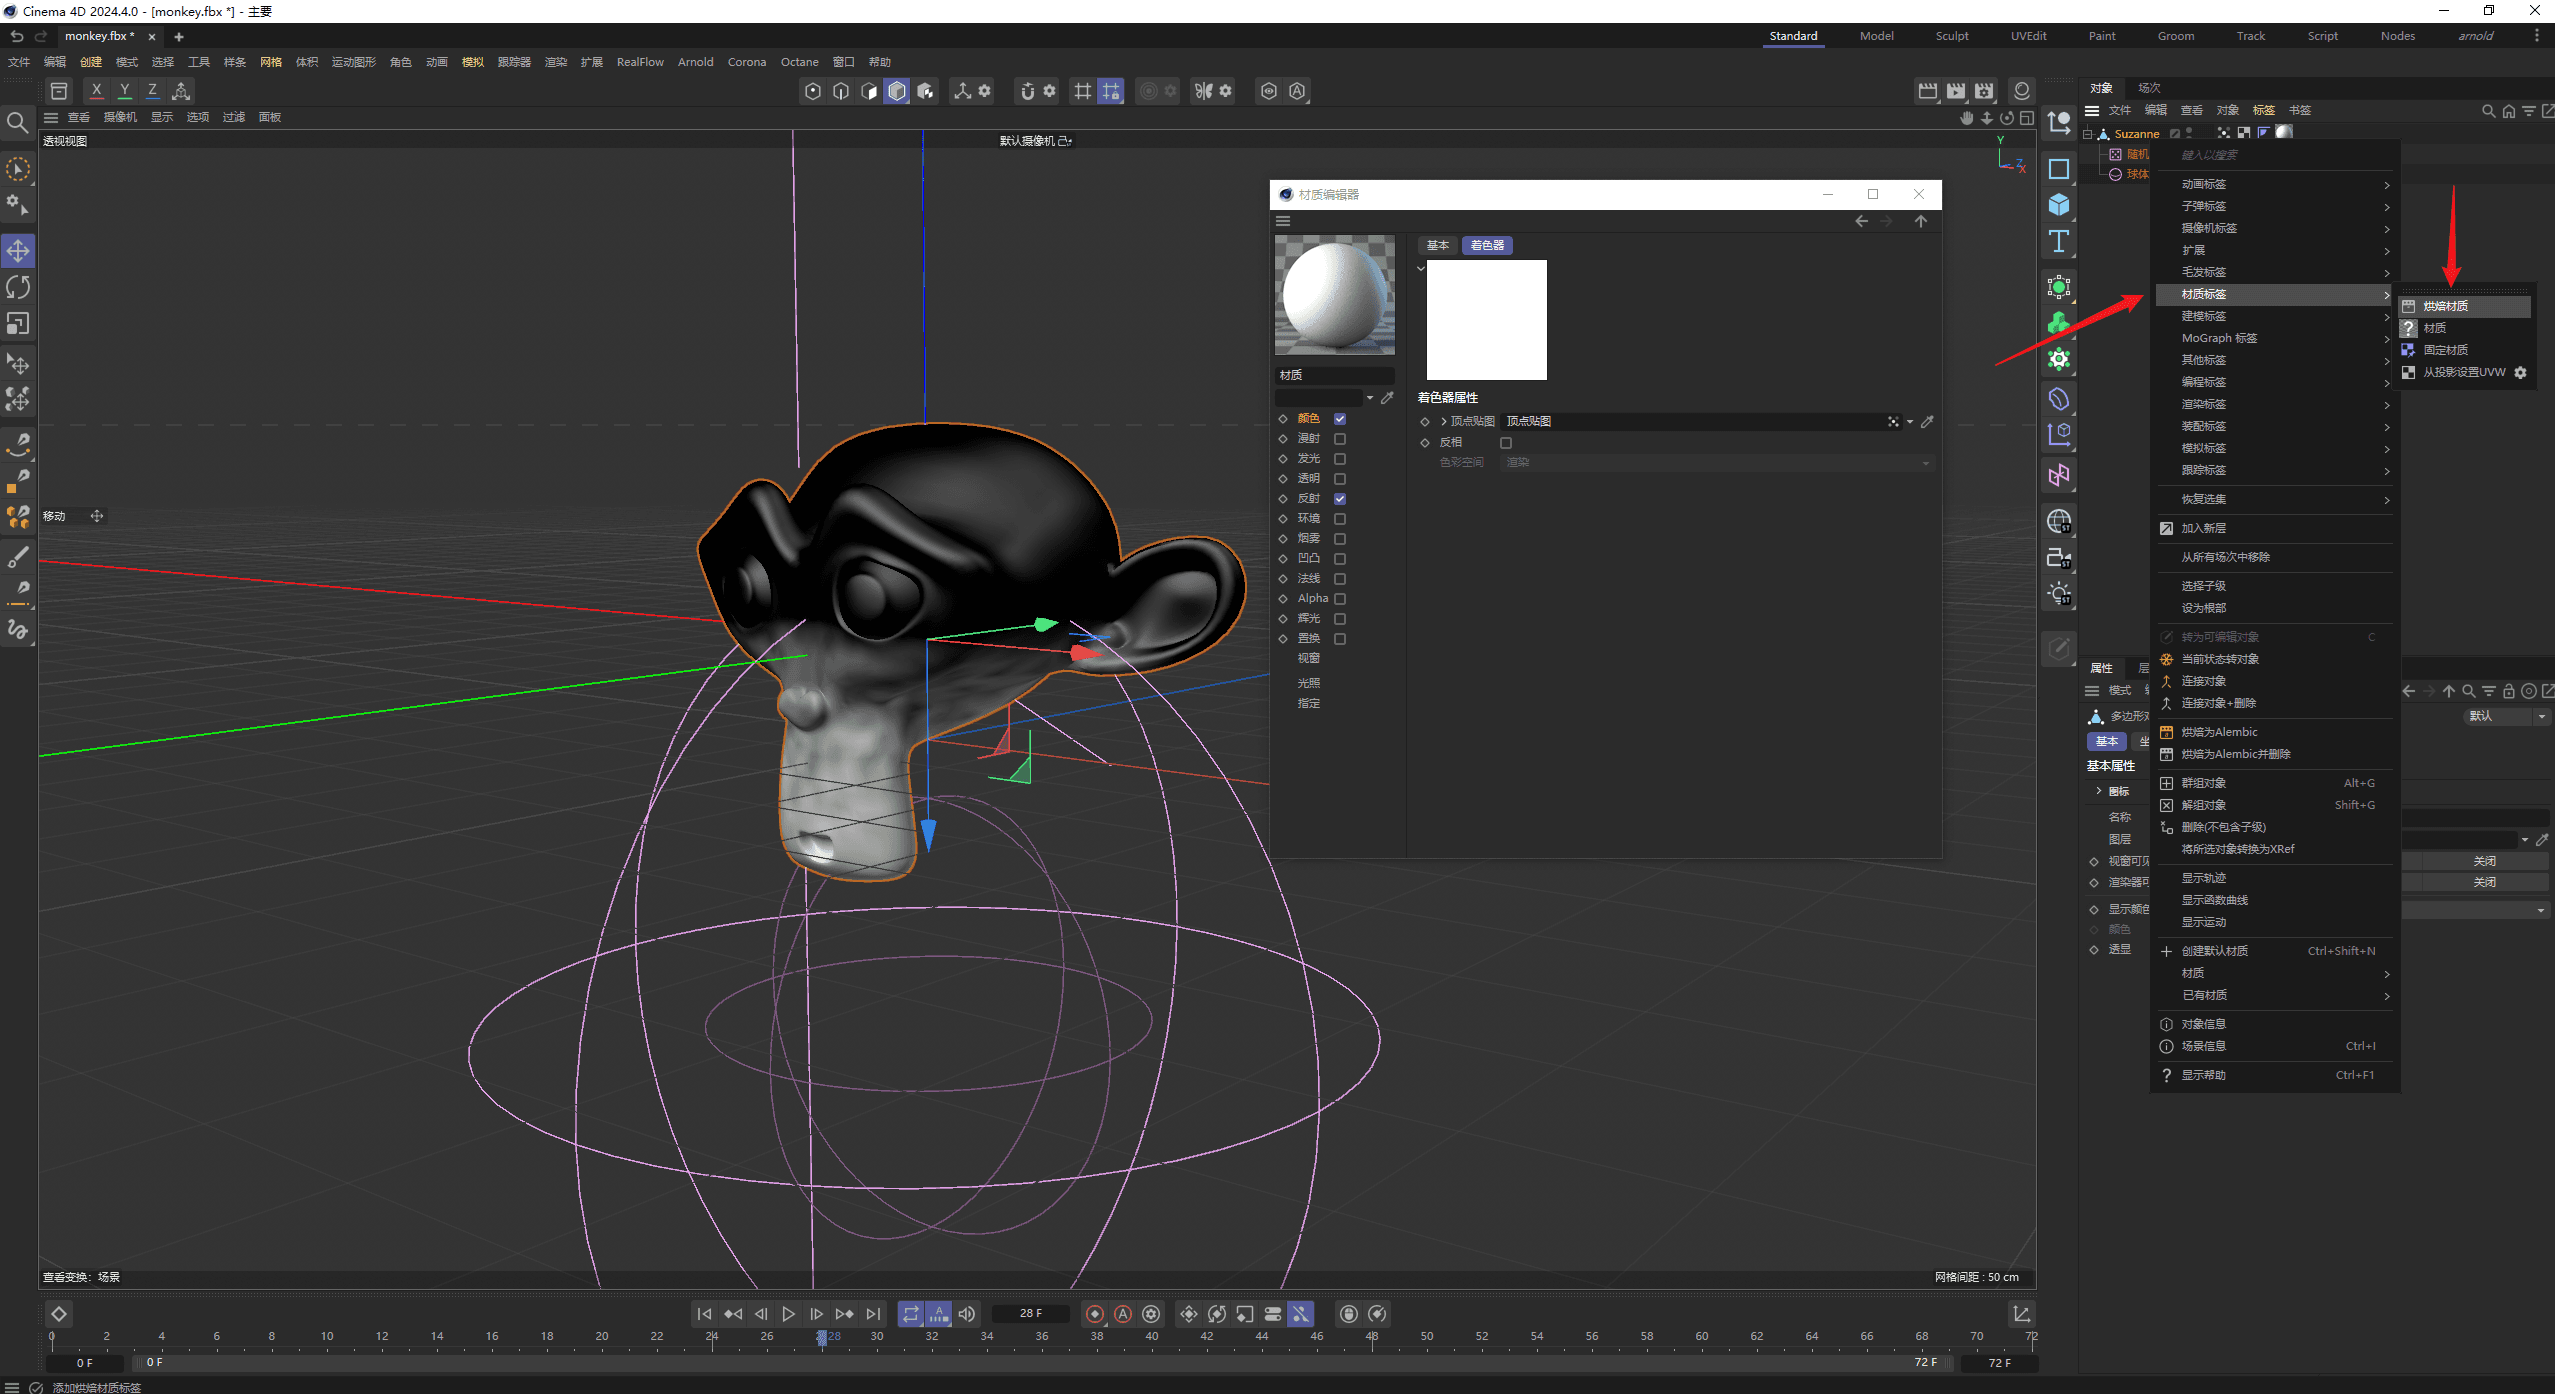
2. Set the parameters of the baked material in the tab page.
2.1 Designate the location where the baked sequence frame maps will be stored and the format of the baked pictures [png].
2.2 Set the size of the baked texture.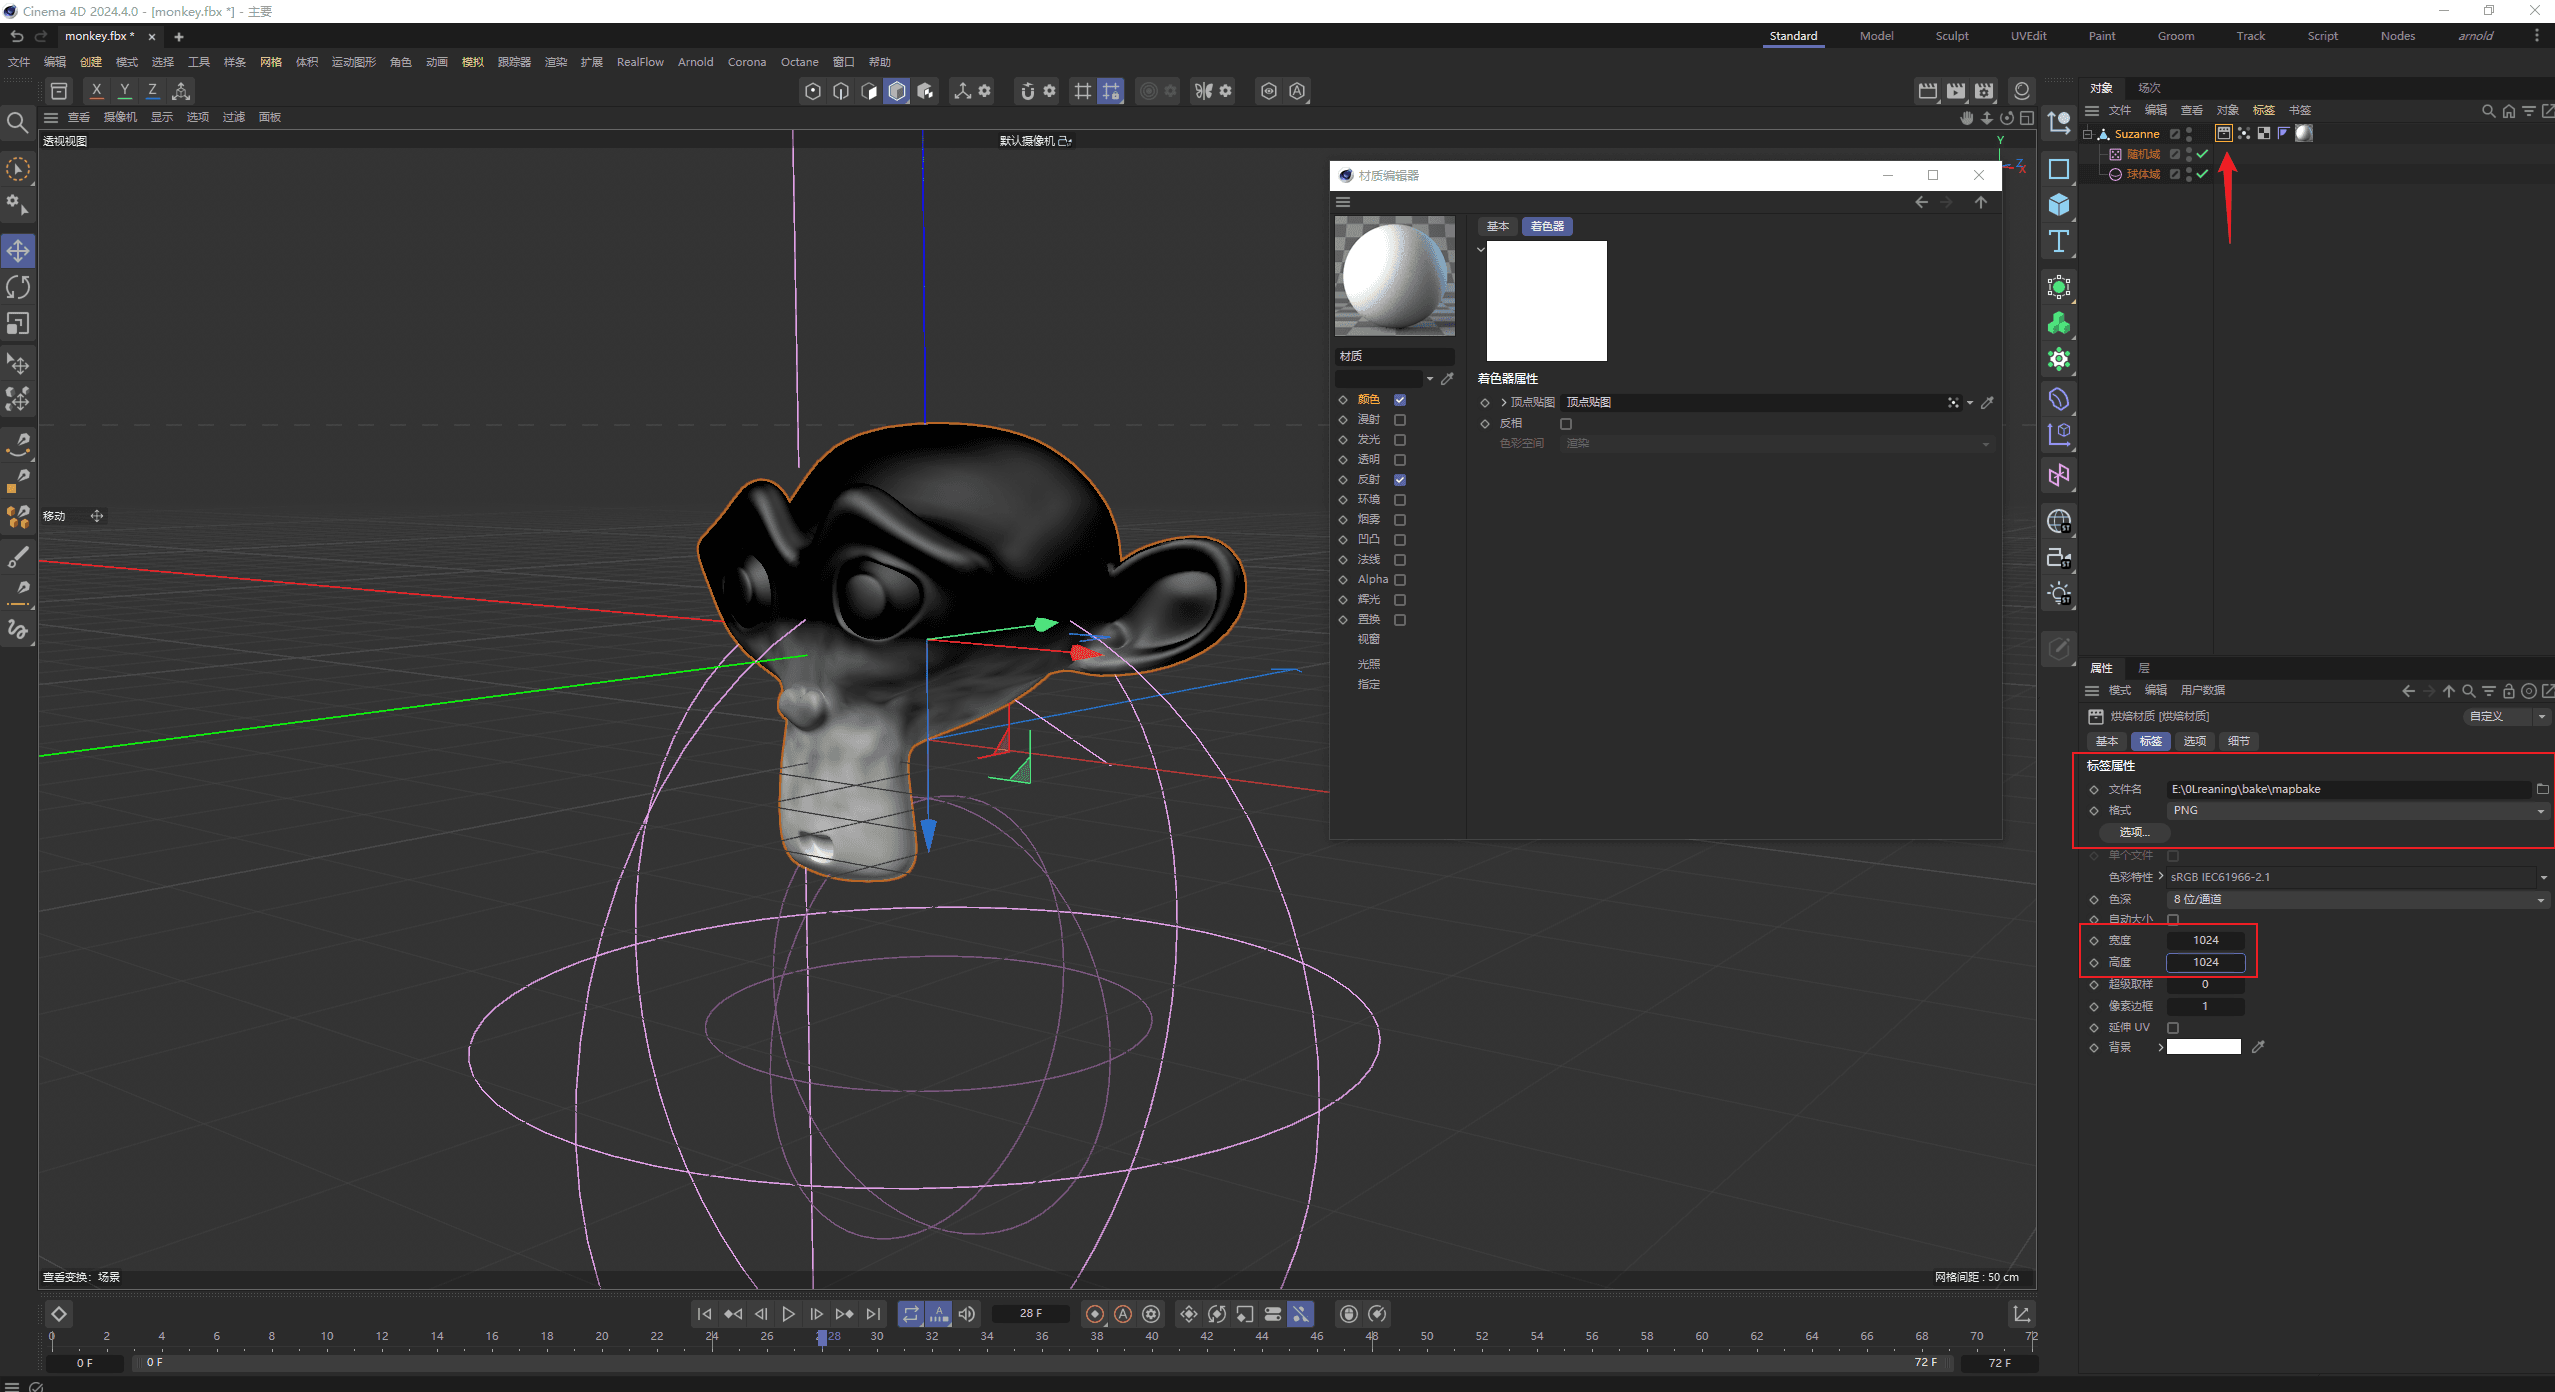
2.3 In the option bar page, check the options of Color and Diffuse, and turn off the Auto UV.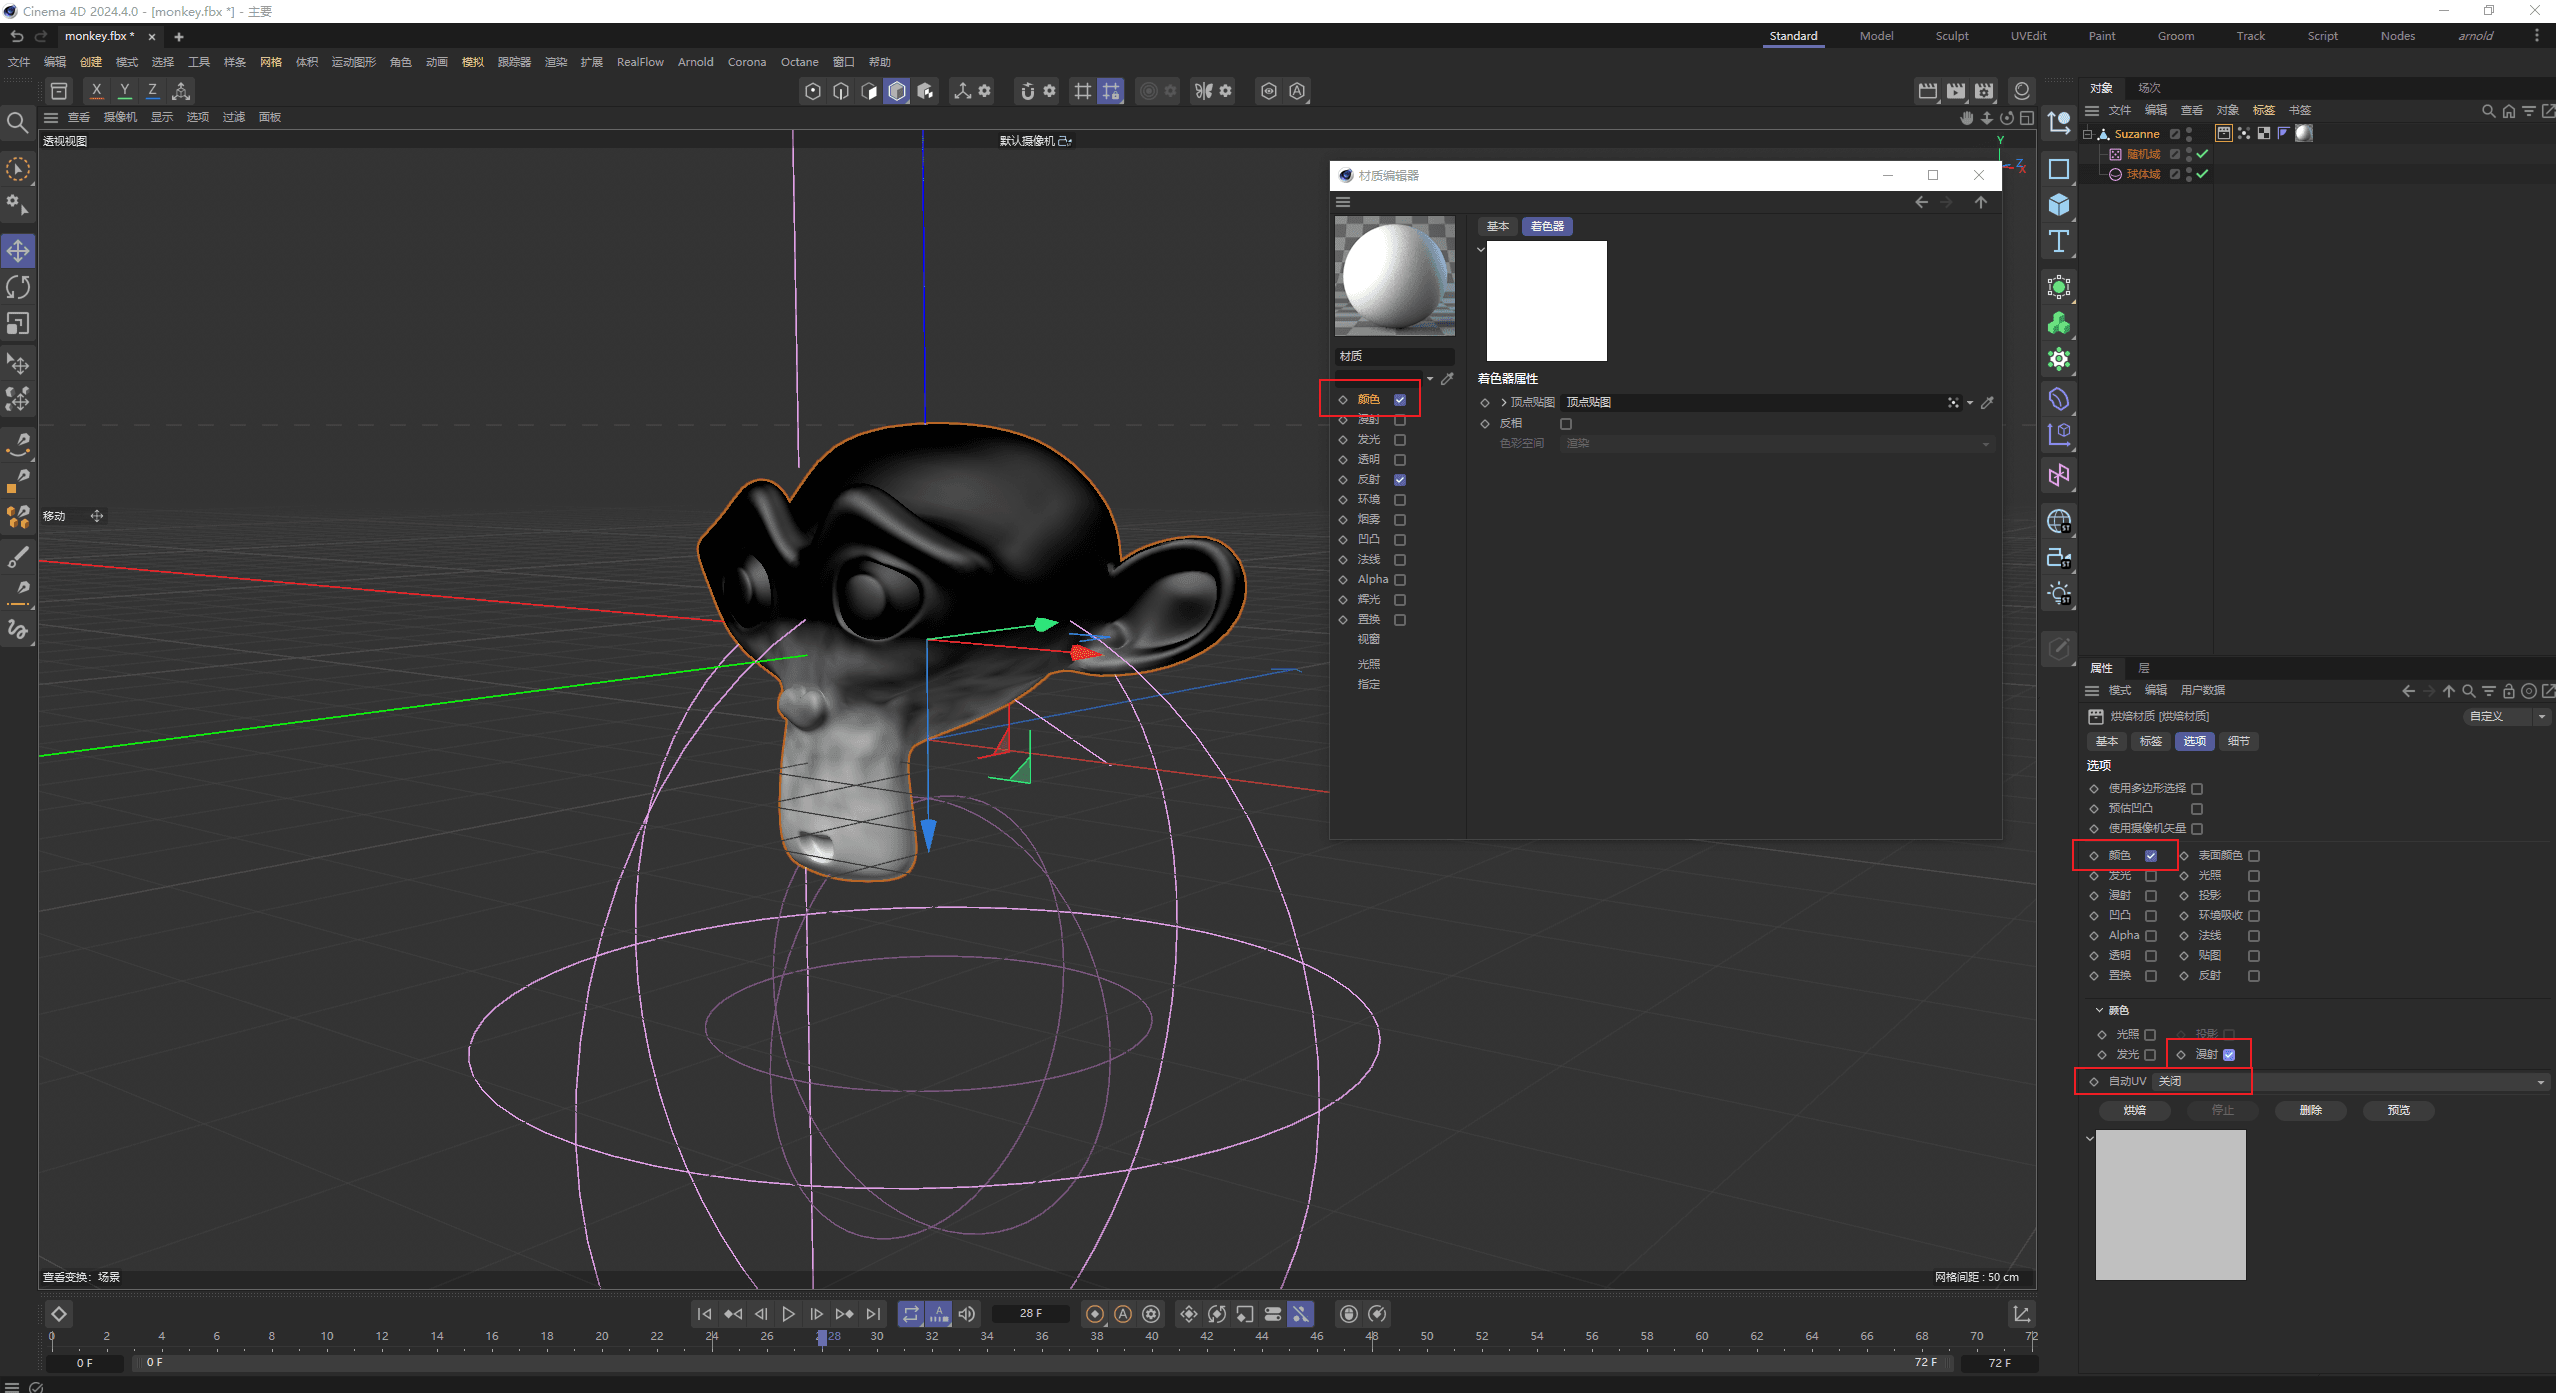
2.4 In the Details bar page, check the option of "Use Current Render Data". The baking will be done according to the frame range of the scene, as shown in the figure.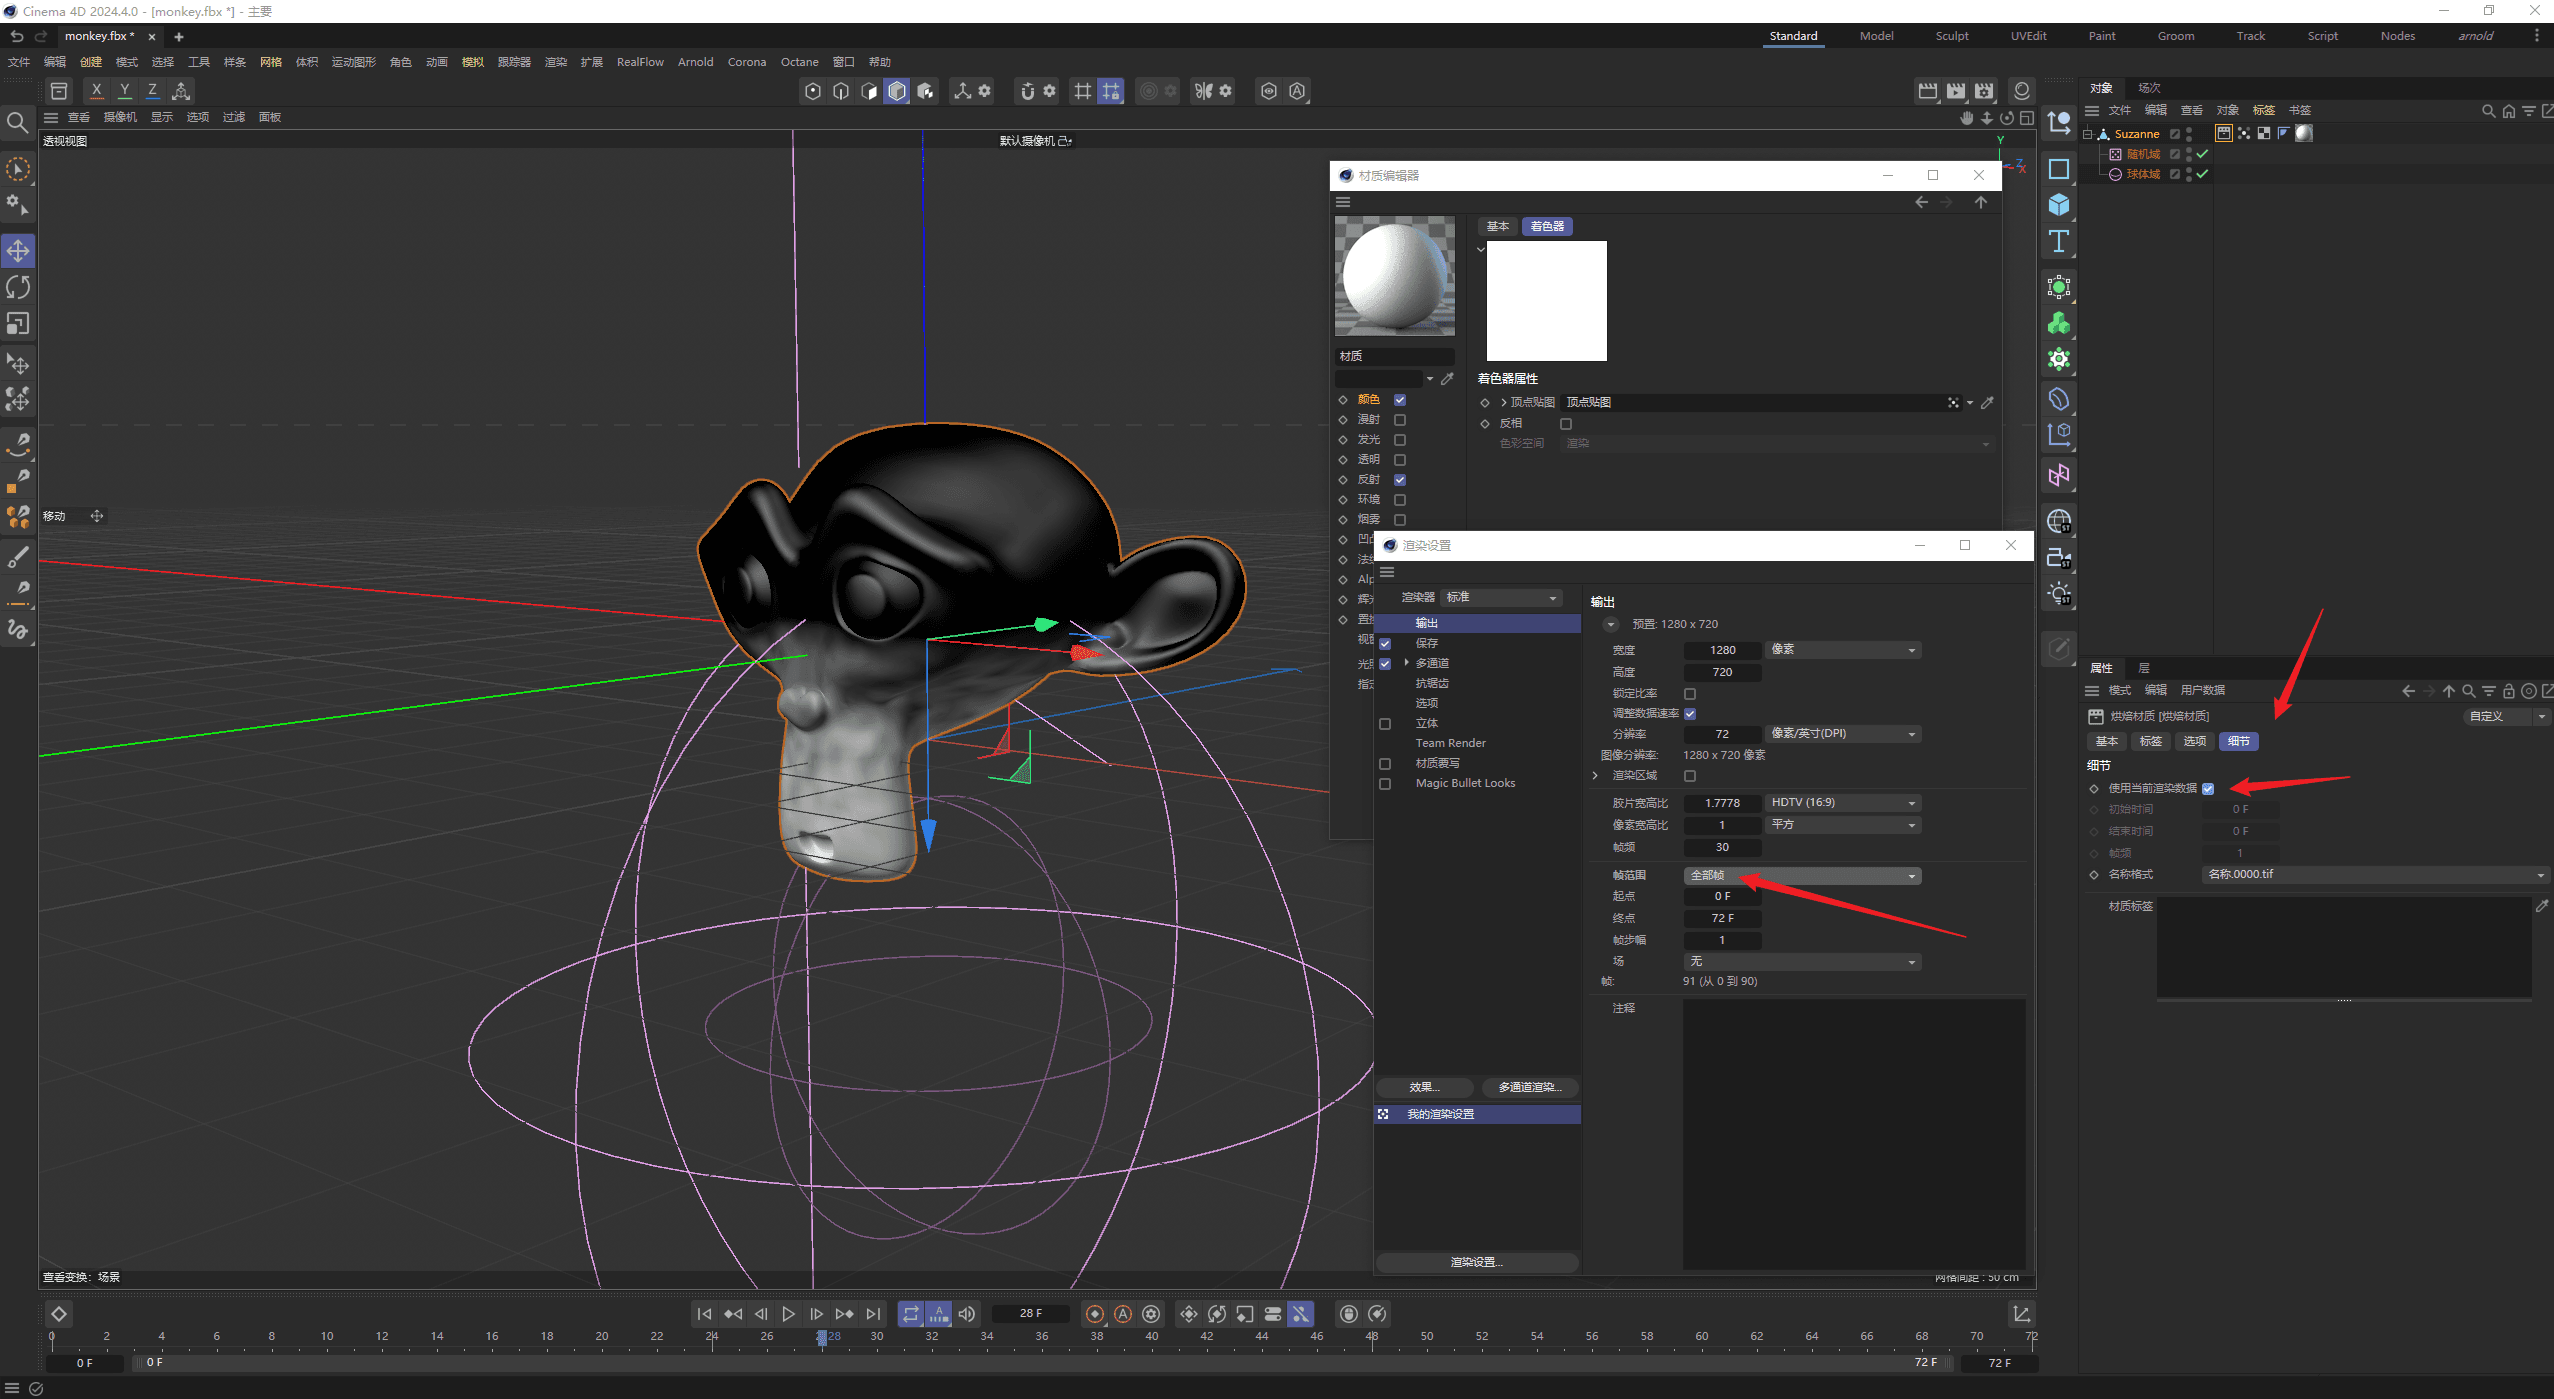
2.5 After completing the above operation settings, go to the option bar page and click "Bake".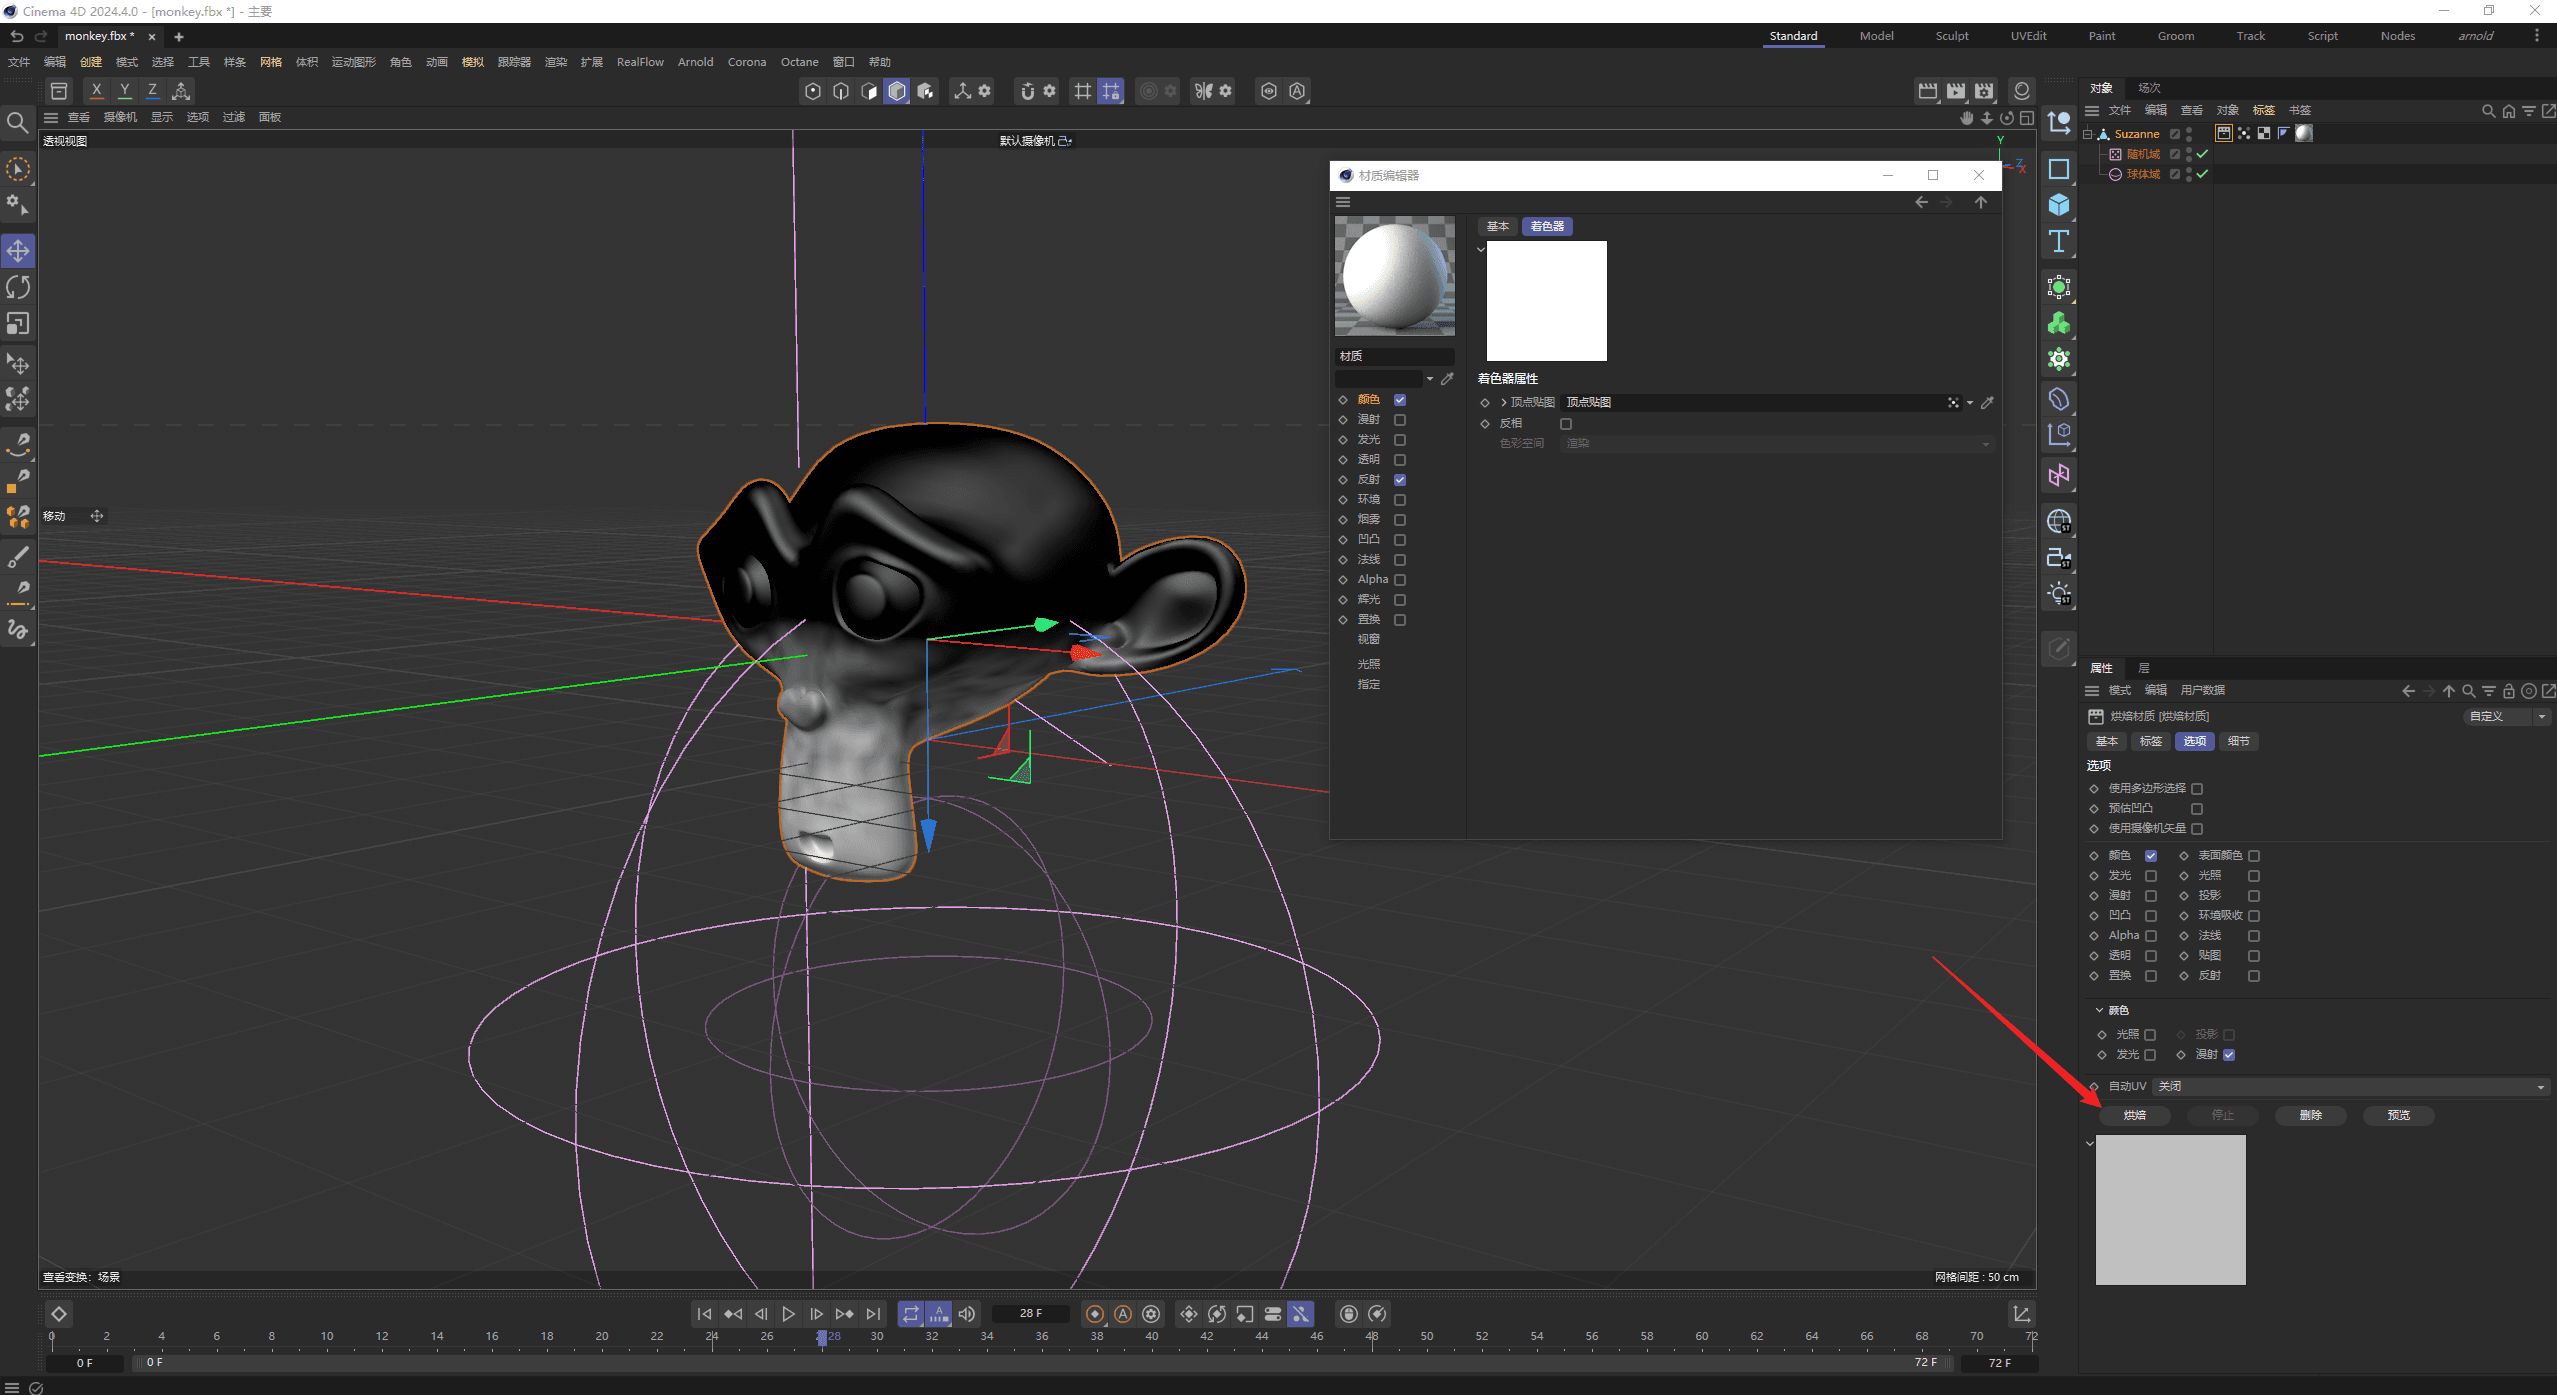
2.6 After the baking is completed, you can go to the folder to check the sequence frame maps. 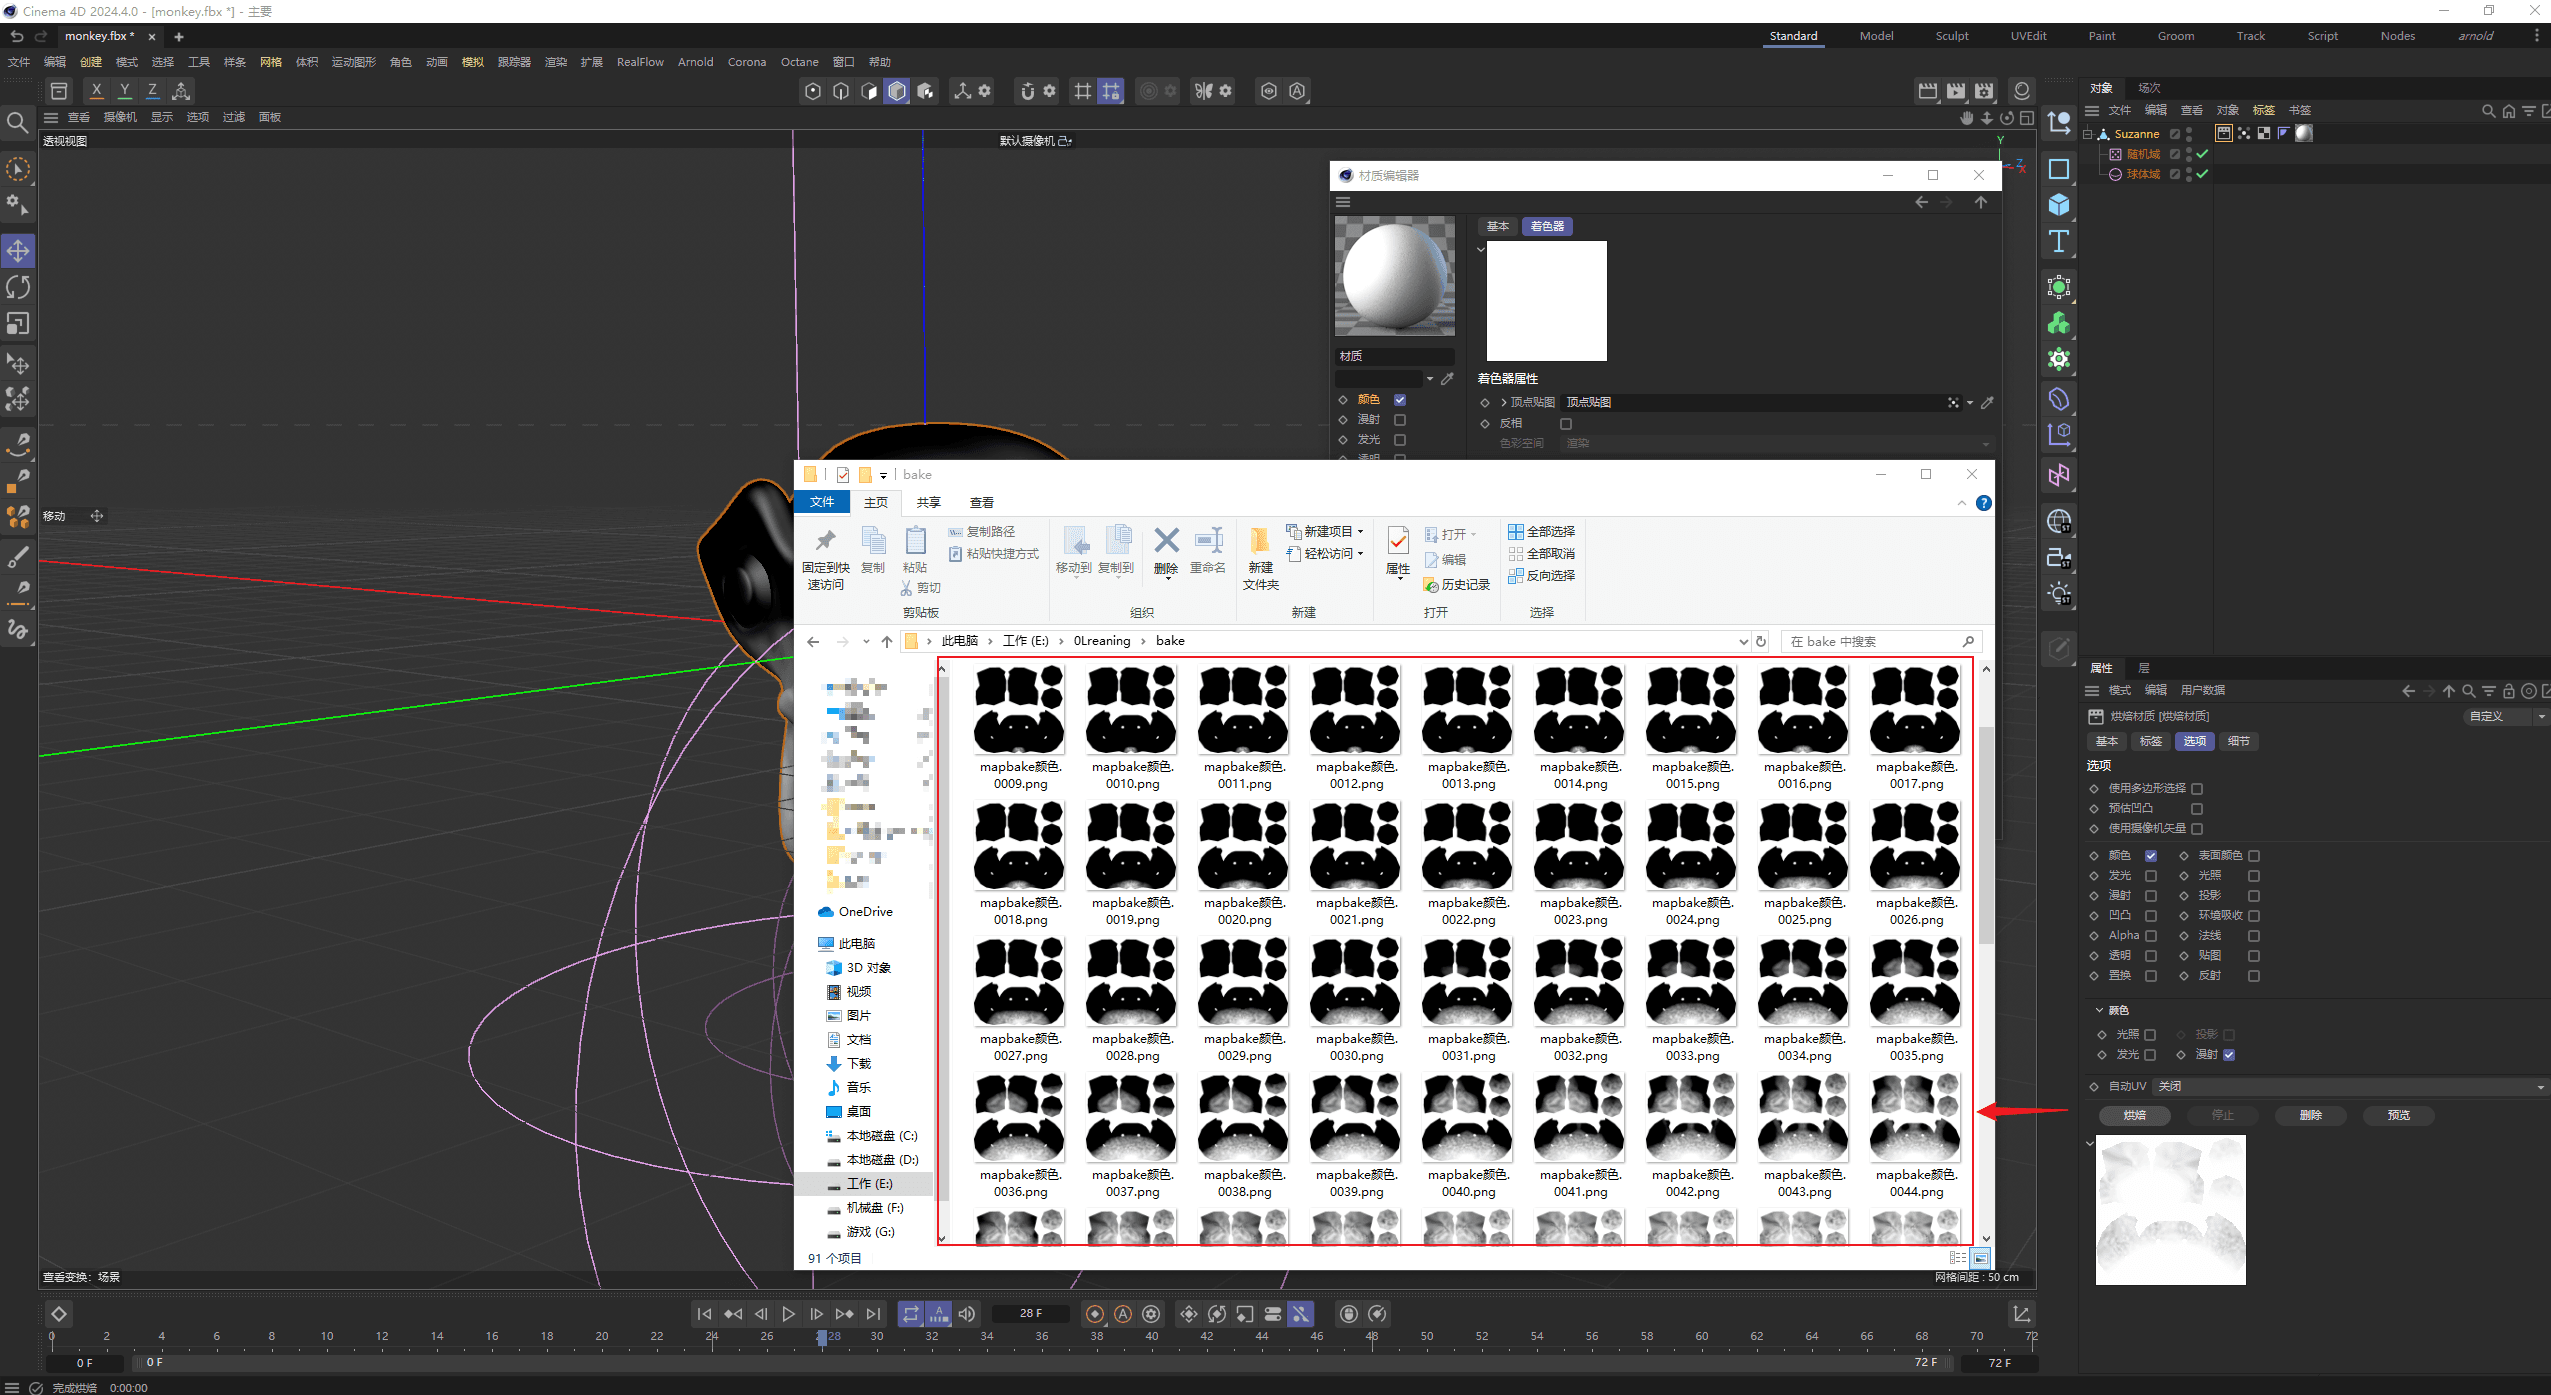
Step 3: Use the baked sequence frame maps to replace the vertex maps.
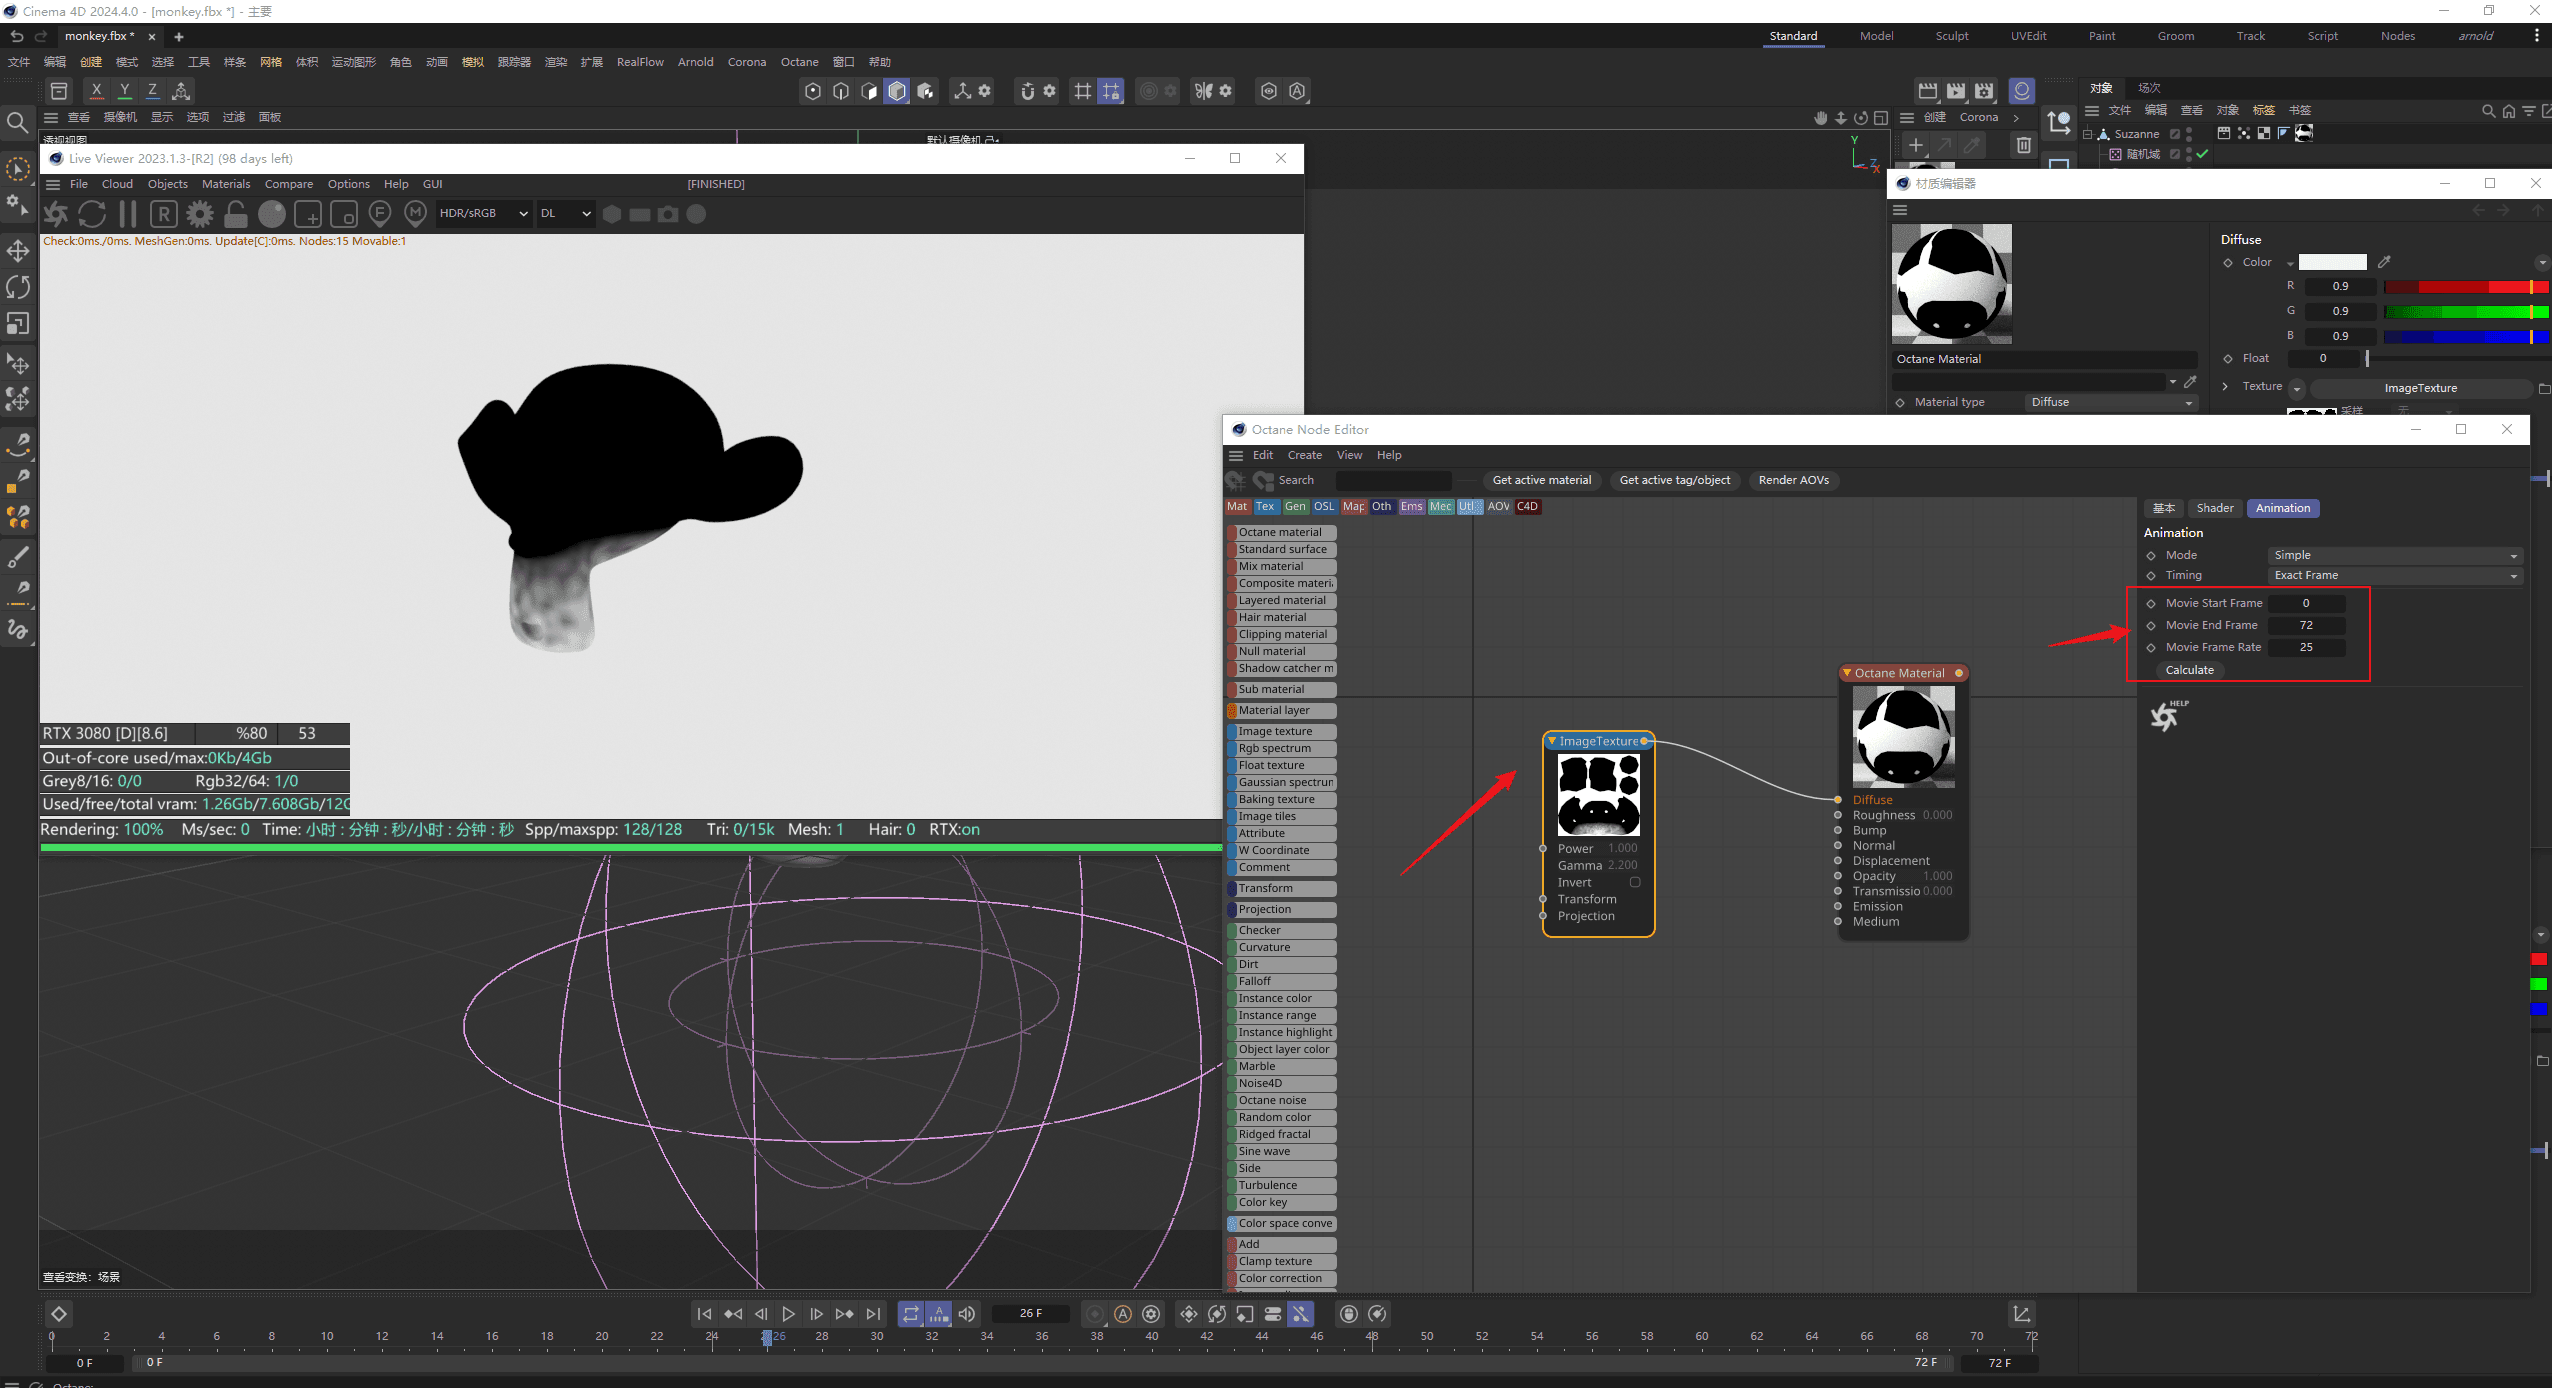
1.Insert the sequence frame maps into the material of the renderer being used.Set the starting frame and the ending frame.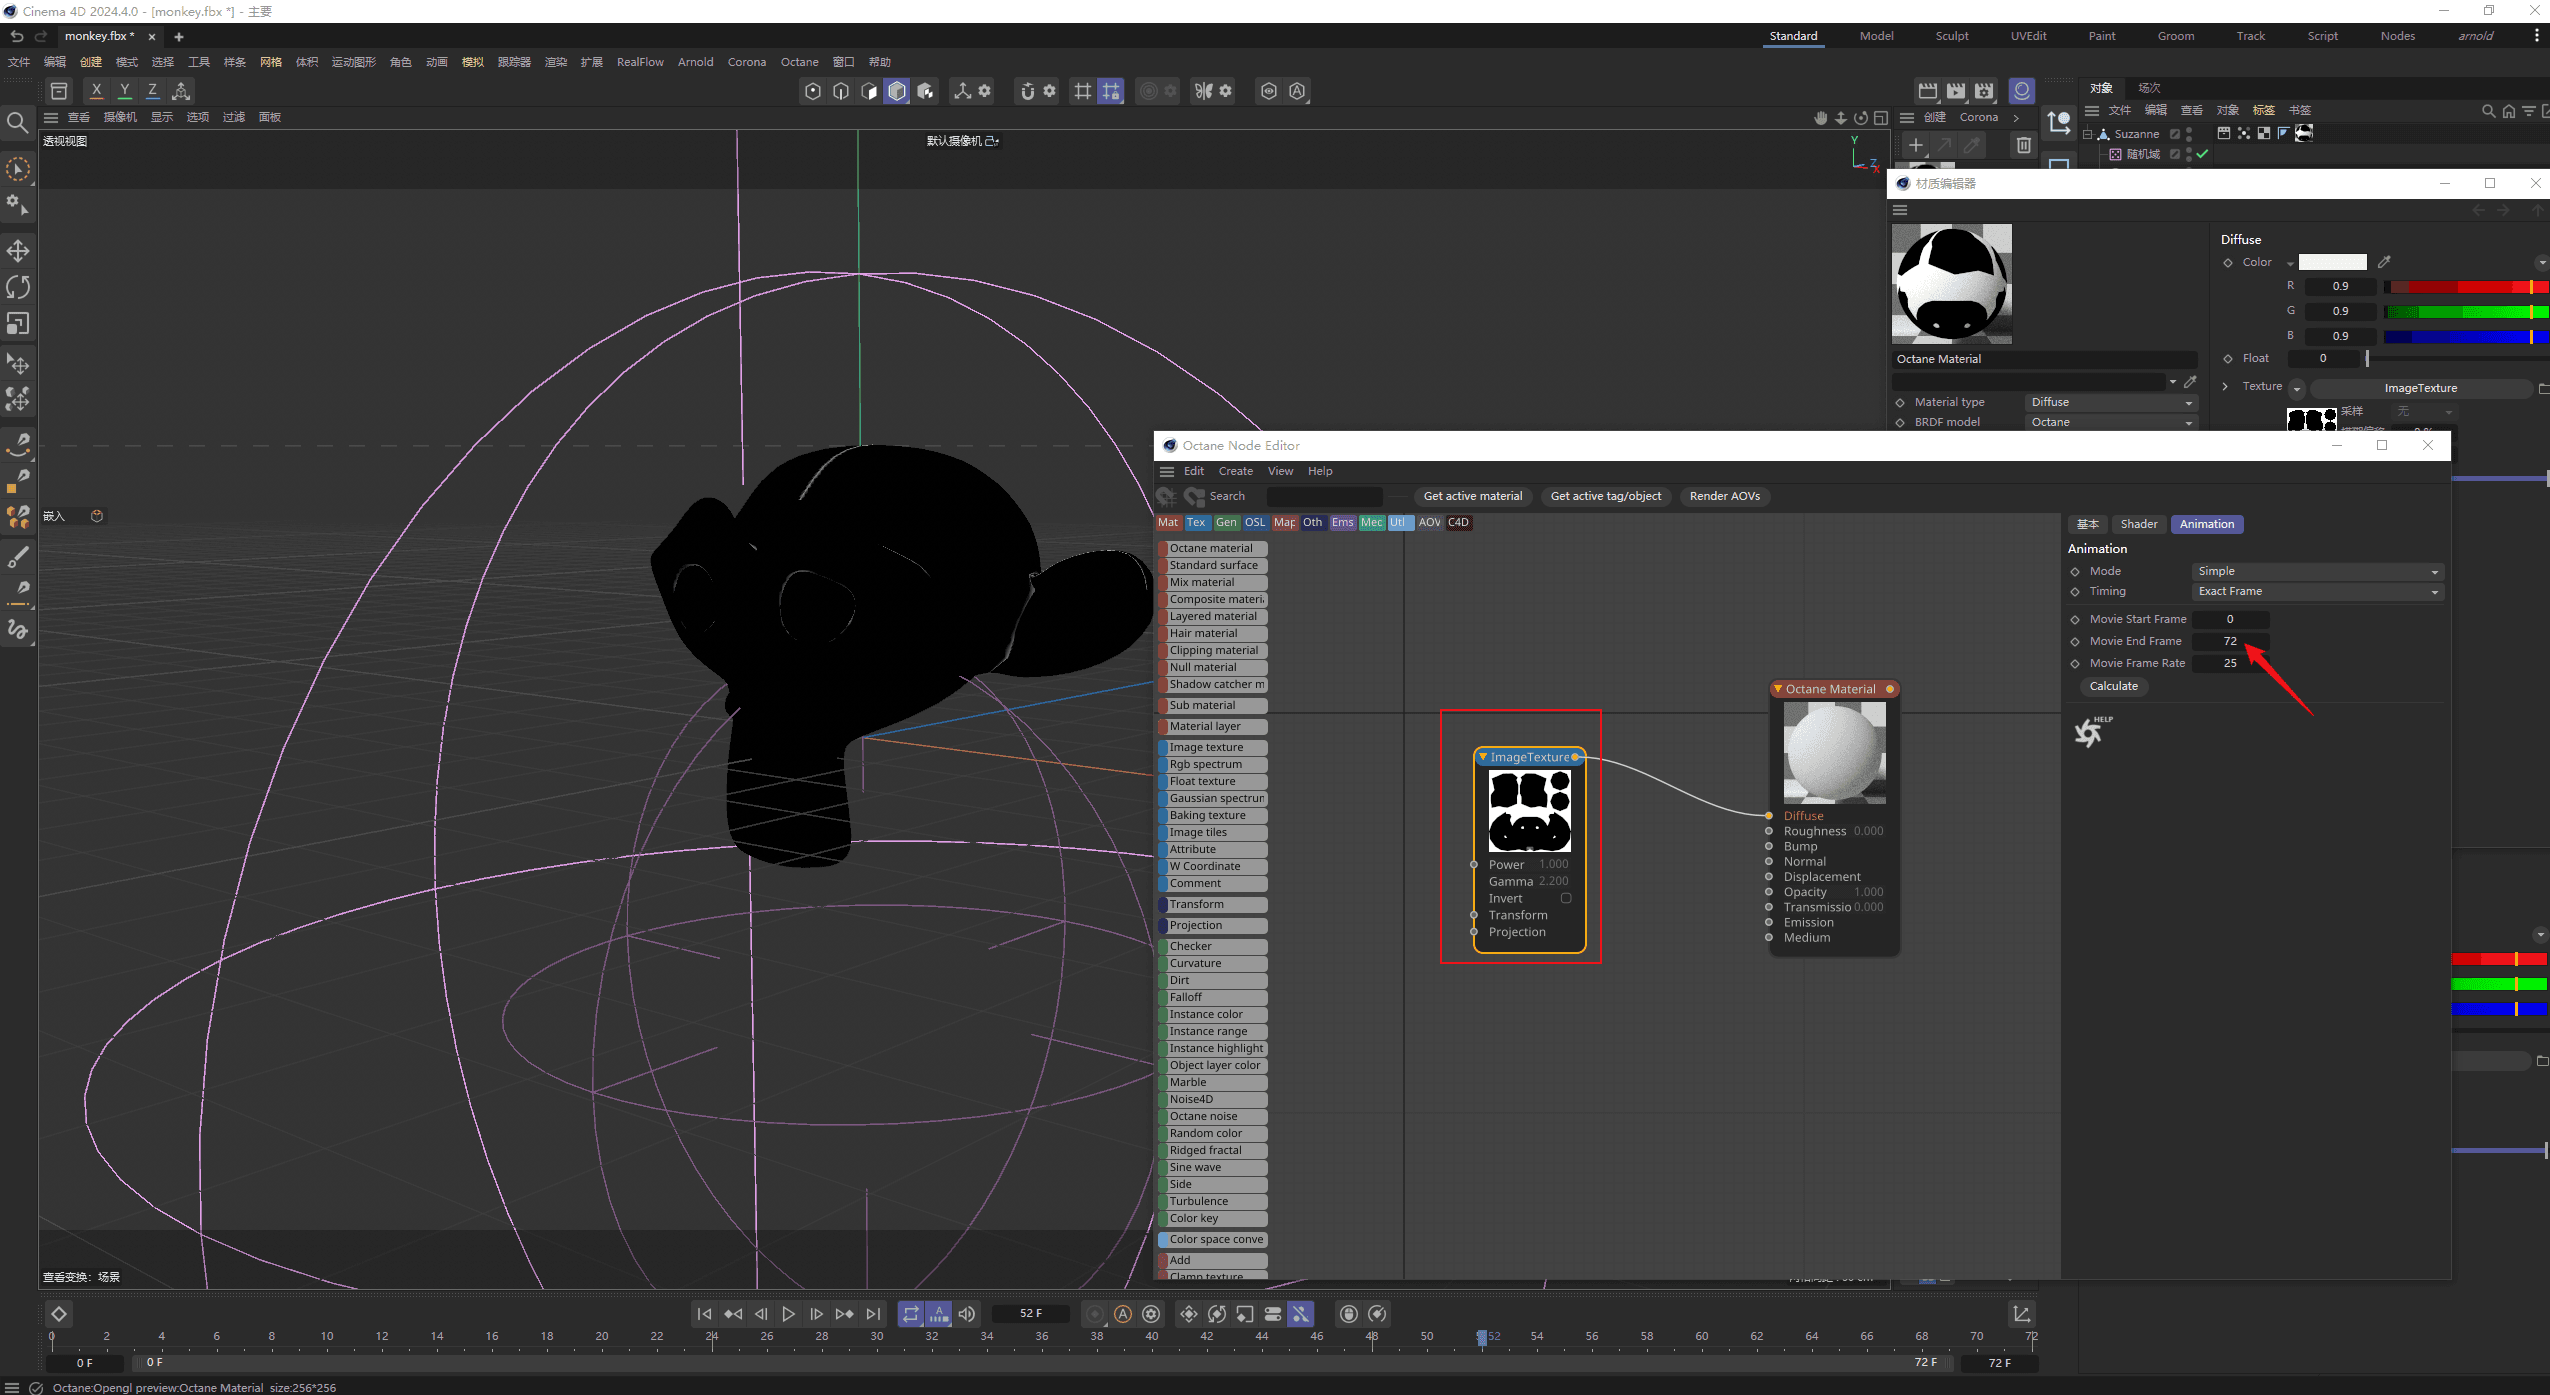
2. Setting successful.